Figures
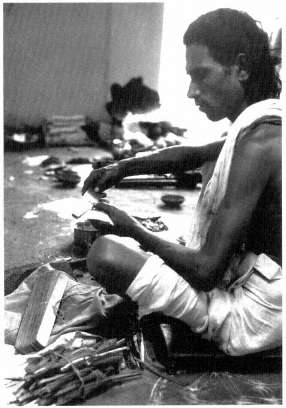
Figure 49.
A brahman reading from a palm-leaf
manuscript (Parlakhemundi, 1981). Photograph
by author.
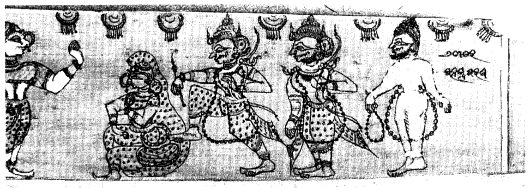
Figure 50.
Sarathi Madala Patnaik, Adhyatma Ramayana[*] (courtesy Orissa State
Museum, dated 1875). Ahalya liberated, f. 8r.
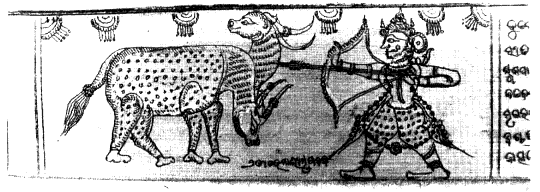
Figure 51.
Sarathi Madala Patnaik, Adhyatma Ramayana[*] (OSM, 1875). Magic
deer, f. 42v.
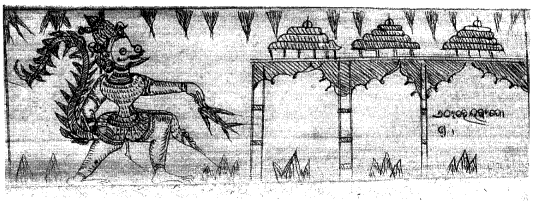
Figure 52.
Sarathi Madala Patnaik, Adhyatma Ramayana[*] (OSM, 1875).
Hanumana in Lanka[*] , f. 75v.
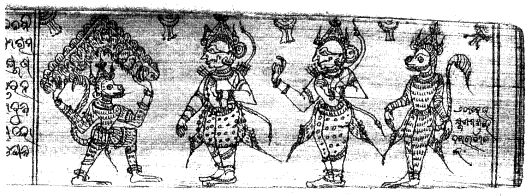
Figure 53.
Sarathi Madala Patnaik, Adhyatma Ramayana[*] (OSM, 1875).
Hanumana bringing mountain, f. 91v.
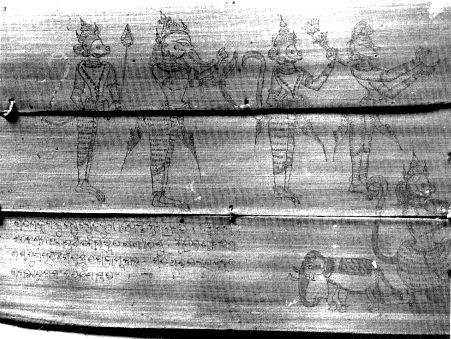
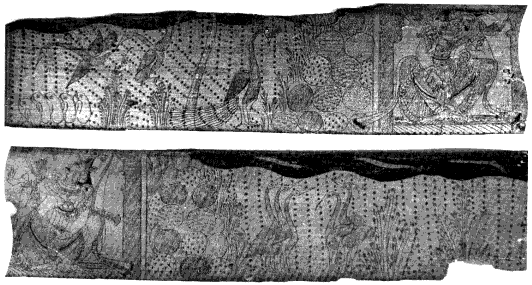
Figure 55.
Sarathi Madala Patnaik, Adhyatma Ramayana[*] (OSM, 1875): (above
and opposite) Coronation of Rama, last three folios.
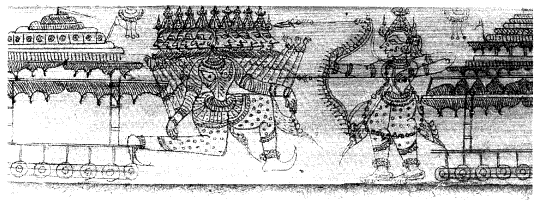
Figure 54.
Sarathi Madala Patnaik, Adhyatma Ramayana[*] (OSM, 1875). Ravana[*]
and Rama, f. 96v.
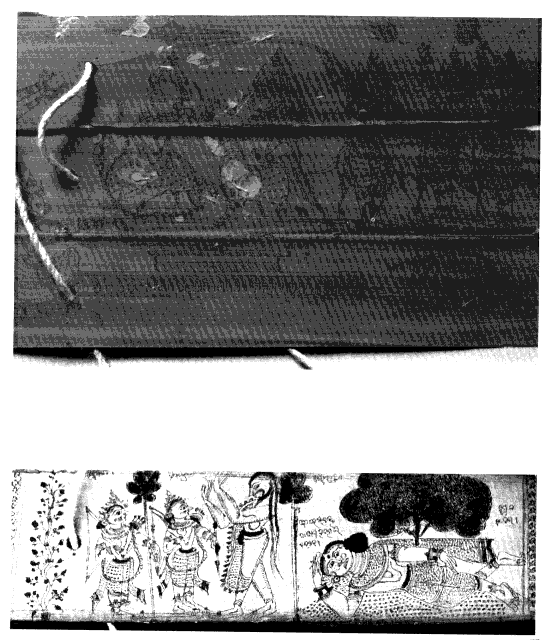
Figure 56.
Sarathi Madala Patnaik, Adhyatma Ramayana[*] (courtesy New York
Public Library, Spencer Collection, Astor, Lenox and Tilden Foundations, dated
1891). Ahalya, f. 9r.
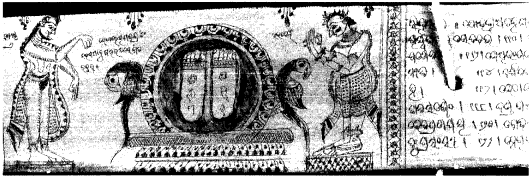
Figure 57.
Sarathi Madala Patnaik, Adhyatma Ramayana[*] (NYPL, 1891). Bharata
with Rama's footprints, f. 33r.
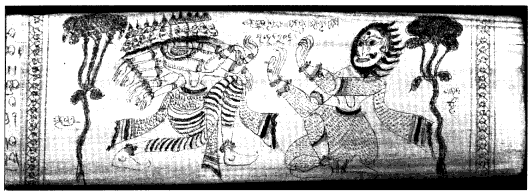
Figure 58.
Sarathi Madala Patnaik, Adhyatma Ramayana[*] (NYPL, 1891).
Surpanakha[*] before Ravana[*] , f. 41r.
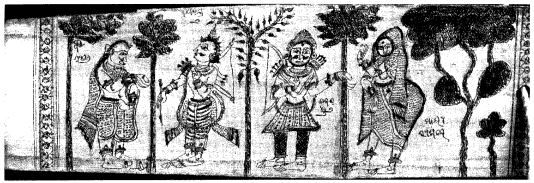
Figure 59.
Sarathi Madala Patnaik, Adhyatma Ramayana[*] (NYPL, 1891). Creation
of Maya Sita, f. 42r.
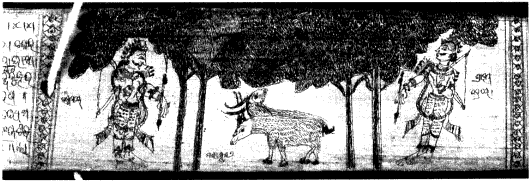
Figure 60.
Sarathi Madala Patnaik, Adhyatma Ramayana[*] (NYPL, 1891). Magic
deer, f. 45r.
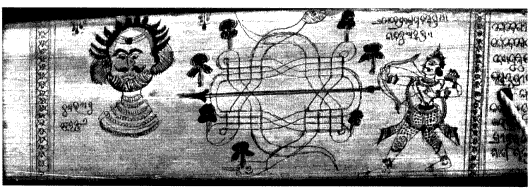
Figure 61.
Sarathi Madala Patnaik, Adhyatma Ramayana[*] (NYPL, 1891). Seven
trees, f. 52v.
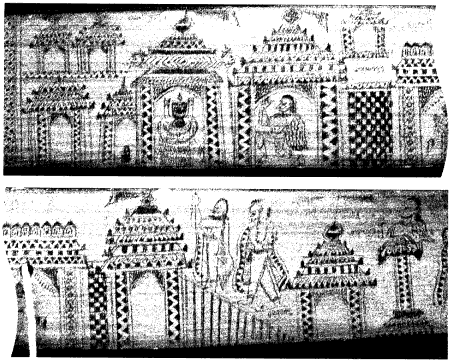
Figure 62.
Sarathi Madala Patnaik, Adhyatma Ramayana[*] (NYPL, 1891).
Jagannatha Temple, f. 80v.
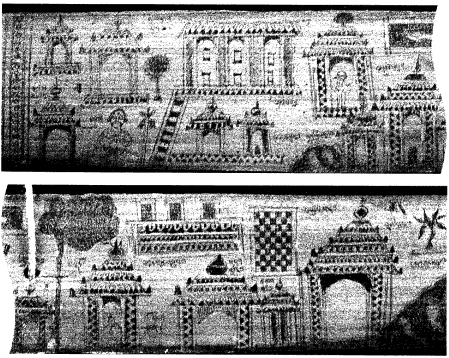
Figure 63.
Sarathi Madala Patnaik, Adhyatma Ramayana[*] (NYPL, 1891). Siva
shrine at Ramesvaram, f. 81r.
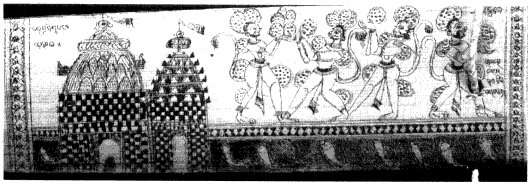
Figure 64.
Sarathi Madala Patnaik, Adhyatma Ramayana[*] (NYPL, 1891). Building
the bridge, f. 88v.
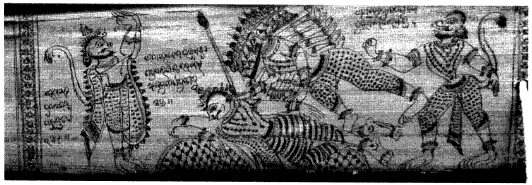
Figure 65.
Sarathi Madala Patnaik, Adhyatma Ramayana[*] (NYPL, 1891). Ravana[*]
and Laksmana[*] , f. 92v.
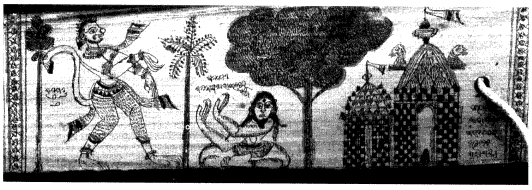
Figure 66.
Sarathi Madala Patnaik, Adhyatma Ramayana[*] (NYPL, 1891).
Hanumana and Kalanemi, f. 93v.
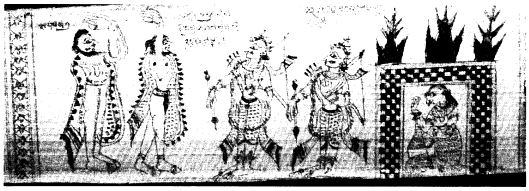
Figure 67.
Sarathi Madala Patnaik, Adhyatma Ramayana[*] (NYPL, 1891). Sita's
test, f. 107v.

Figure 68.
Sarathi Madala Patnaik, Adhyatma Ramayana[*] (C. L. Bharany
Collection, New Delhi, dated 1891). Magic deer, f. 64v.
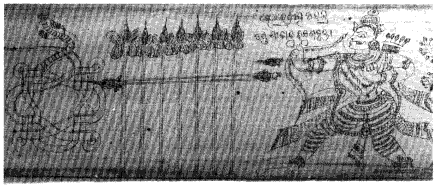
Figure 69.
Sarathi Madala Patnaik, Adhyatma Ramayana[*] (Bharany Col., 1891).
Seven trees, f. 77r.
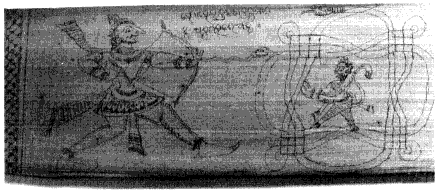
Figure 70.
Sarathi Madala Patnaik, Adhyatma Ramayana[*] (Bharany Col., 1891).
Indrajita, serpent-arrow, and Hanumana, f. 104v.
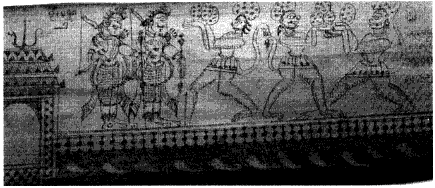
Figure 71.
Sarathi Madala Patnaik, Adhyatma Ramayana[*] (Bharany Col., 1891).
Building the bridge, f. 118v.
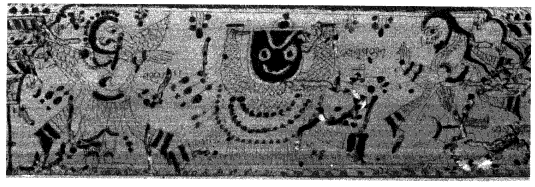
Figure 72.
Sarathi Madala Patnaik, Adhyatma Ramayana[*] (courtesy Utkal
University Library, dated 1902). Jagannatha, f. 101v.
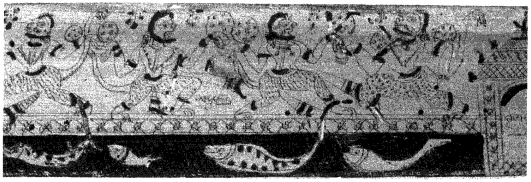
Figure 73.
Sarathi Madala Patnaik, Adhyatma Ramayana[*] (UUL, 1902). Building
the bridge, f. 111v.
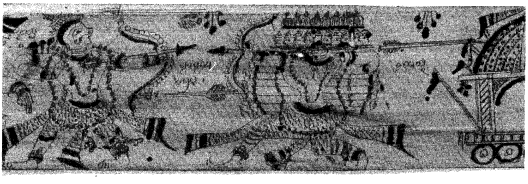
Figure 74.
Sarathi Madala Patnaik, Adhyatma Ramayana[*] (UUL, 1902). Rama and
Ravana[*] , f. 130v.
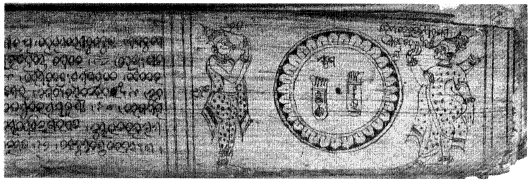
Figure 75.
Adhyatma Ramayana[*] , anon: (courtesy National Museum, New Delhi,
no. 75.536). Bharata with Rama's footprints, f. 45r.
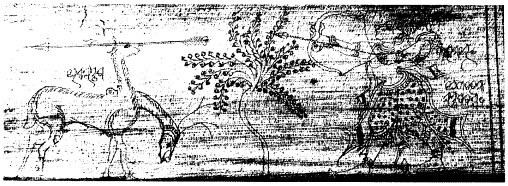
Figure 76.
Adhyatma Ramayana[*] (NM 75.536). Magic deer, f. 50r.
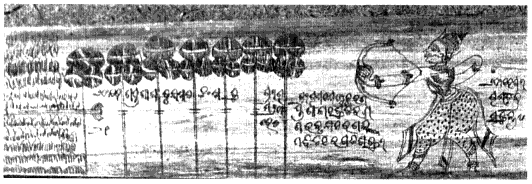
Figure 77.
Adhyatma Ramayana[*] (NM 75.536). Seven trees, f. 61r.
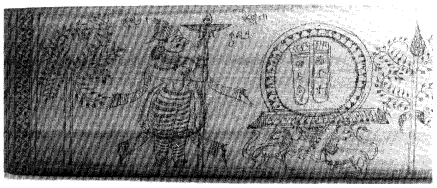
Figure 78.
Adhyatma Ramayana[*] , anon. (C. L. Bharany Collection, New Delhi).
Bharata with Rama's footprints, f. 52r.
Figure 79.
Adhyatma Ramayana[*] (Bharany Col.). Three-
headed deer as marginalia, f. 95r.
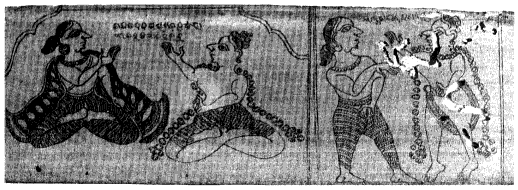
Figure 80.
Adhyatma Ramayana[*] , Uttara Kanda[*] , anon. (private collection, New
Delhi). Rama and Kaladeva, f. 195r.
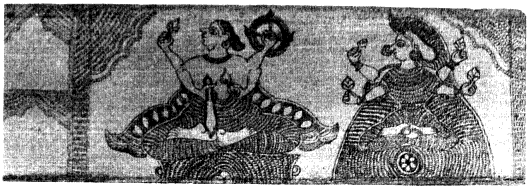
Figure 81.
Adhyatma Ramayana[*] , Uttara Kanda[*] (pc, ND). Visnu[*] and Laksmi[*] in
Vaikuntha[*] f. 200r.
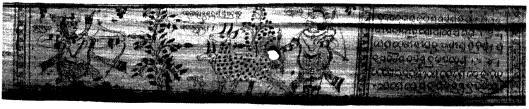
Figure 82.
Sarathi Madala Patnaik, Durga Stuti (courtesy of L.D. Institute of
Indology, Ahmedabad, dated 1899). Magic deer, f. 13r.
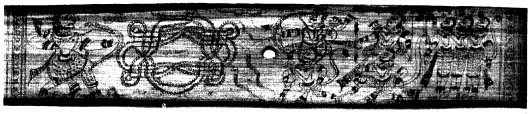
Figure 83.
Sarathi Madala Patnaik, Durga Stuti (LDI, 1899). Indrajita, serpent-
arrow, Rama and Laksmana[*] f. 16r.
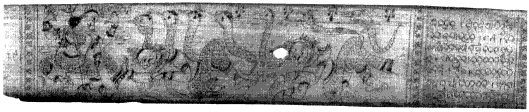
Figure 84.
Sarathi Madala Patnaik, Durga Stuti (LDI, 1899). Durga rescues
Rama and Laksmana[*] , f. 19r.
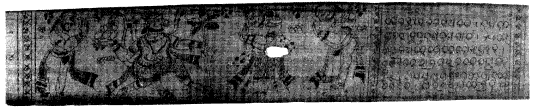
Figure 85.
Sarathi Madala Patnaik, Hanumana Stuti (LDI, 1899). Hanumana
carrying mountain, f. 24r.
Figure 86.
Sarathi Madala Patnaik, Hanumana Stuti (LDI, 1899). Hanumana
before Ravana[*] , f. 30v.
Figure 87.
Ramalila[*] , anon. (courtesy National Museum, New Delhi, no.
75.556). Ravana[*] fighting Navaguñjara, f. 58r.
Figure 88.
Ramalila[*] (NM 75.556). Laksmana[*] meets Rama with body of magic
deer, f. 59v.
Figure 89.
Satrughna, Vaidehisa Vilasa[*] (Jubel Library, Baripada, dated 1833).
Risyasringa[*] and courtesans.
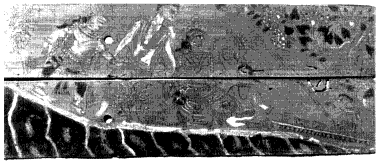
Figure 90.
Satrughna, Vaidehisa Vilasa[*] (Baripada, 1833). Boatman
washes Rama's feet.
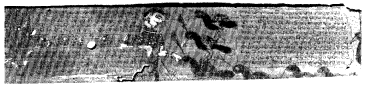
Figure 91.
Satrughna, Vaidehisa Vilasa[*] (Baripada, 1833). Rama
shoots the crow.
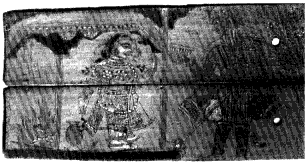
Figure 92.
Satrughna, Vaidehisa Vilasa[*] (Baripada, 1833).
Sita in fire, Maya Sita, Ravana[*] as beggar (detail of Plate 5).
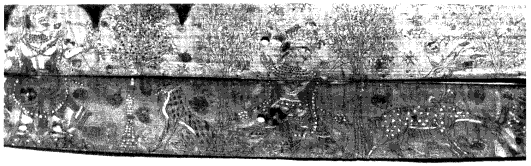
Figure 93.
Satrughna, Vaidehisa Vilasa[*] (Baripada, 1833).
Rama and the magic deer.
Figure 94.
Satrughna, Vaidehisa Vilasa[*] (Baripada, 1833). Rama, Laksmana[*] , and
the cowherds.
Figure 95.
Satrughna, Vaidehisa Vilasa[*] (Baripada, 1833). Seven trees.
Figure 96.
Satrughna, Vaidehisa Vilasa[*] (Baripada, 1833). Valin and
Sugriva fight.
Figure 97.
Satrughna, Vaidehisa Vilasa[*] (Baripada, 1833). Building the
bridge.
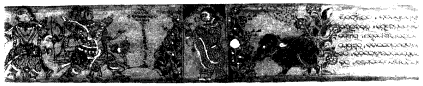
Figure 99.
Satrughna, Vaidehisa Vilasa[*] no. 2 (Museum Rietberg, Zurich RVI
1194). Ahalya liberated.
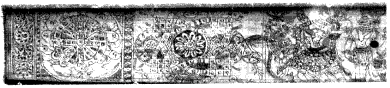
Figure 100.
Satrughna, Vaidehisa Vilasa[*] no. 2 (private collection, New
Delhi). Seven trees.
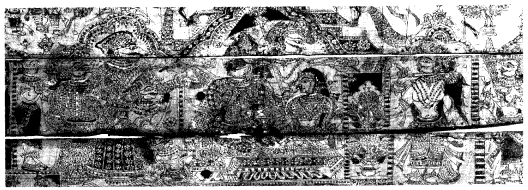
Figure 101.
Satrughna, Vaidehisa Vilasa[*] no. 2 (Museum Rietberg, Zurich RVI
1194). Coronation of Rama, ff. 154-156r.
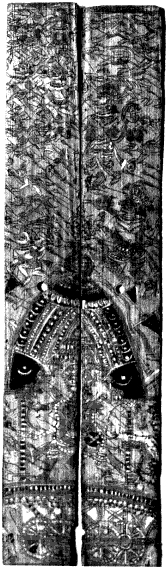
Figure 98.
Satrughna, Vaidehisa Vilasa[*] (Baripada, 1833).
Battle.
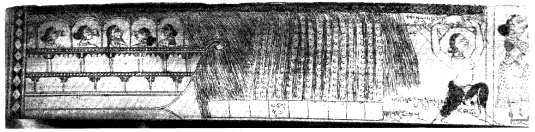
Figure 102.
Michha Patajoshi, Vaidehisa Vilasa[*] (courtesy Shri Mahavir Jain
Aradhana Kendra, Koba, dated 1902). Risyasringa[*] brings rains, f. 18r.
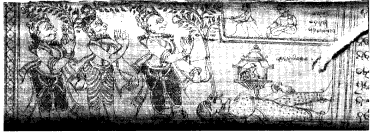
Figure 103.
Michha Patajoshi, Vaidehisa Vilasa[*] (MJAK, 1902).
Tadaki's[*] apotheosis, f. 29r.
Figure 104.
Michha Patajoshi, Vaidehisa Vilasa[*] (MJAK, 1902). Ahalya
liberated, f. 32r.
Figure 105.
Michha Patajoshi, Vaidehisa Vilasa[*] (MJAK, 1902).
Ahalya with Indra, Gautama's return, f. 33r.
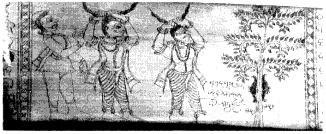
Figure 106.
Michha Patajoshi, Vaidehisa Vilasa[*] (MJAK, 1902).
Rama and Laksmana[*] bind up their hair in exile, f. 69r.
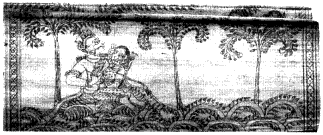
Figure 107.
Michha Patajoshi, Vaidehisa Vilasa[*] (MJAK,
1902). The ocher mark.
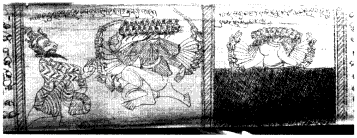
Figure 108.
Michha Patajoshi, Vaidehisa Vilasa[*] (MJAK, 1902).
Ravana[*] and Maricha, Ravana's[*] bath.
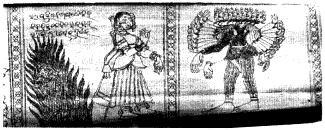
Figure 109.
Michha Patajoshi, Vaidehisa Vilasa[*] (MJAK,
1902). Sita in fire, Maya Sita, Ravana[*] .
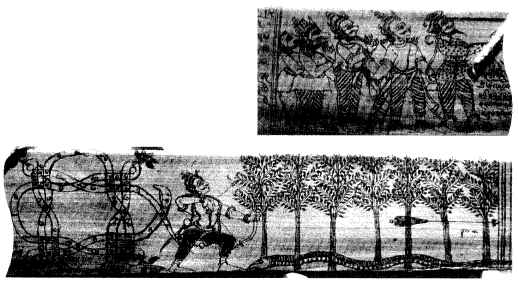
Figure 110.
Michha Patajoshi, Vaidehisa Vilasa[*] (MJAK, 1902).
Seven trees.

Figure 111.
Michha Patajoshi, Vaidehisa Vilasa[*]
(MJAK, 1902). Chakra bandha.
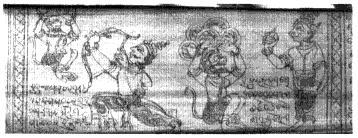
Figure 112.
Michha Patajoshi, Vaidehisa Vilasa[*] (MJAK, 1902).
Hanumana with mountain encounters Bharata, f. 186r.

Figure 113.
Michha Patajoshi, Vaidehisa Vilasa[*] (private collection, New Delhi,
dated 1914). Risyasringa[*] brings rains, f. 18r.
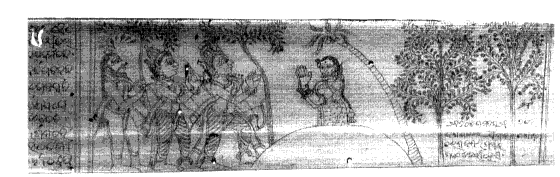
Figure 114.
Michha Patajoshi, Vaidehisa Vilasa[*] (pc, ND, 1914).
Ahalya liberated, f. 29v.
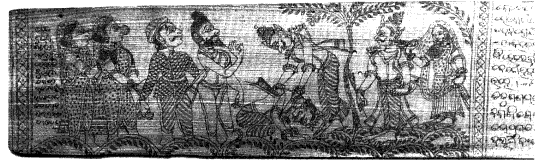
Figure 115.
Michha Patajoshi, Vaidehisa Vilasa[*] (pc, ND, 1914). Bharata's visit,
f. 69r.
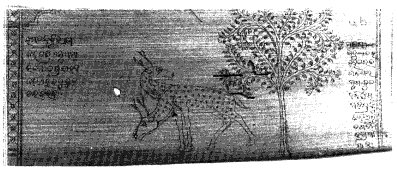
Figure 116.
Michha Patajoshi, Vaidehisa Vilasa[*] (pc, ND, 1914).
Magic deer, f. 82,v.
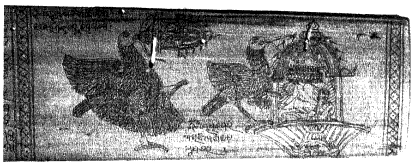
Figure 117.
Michha Patajoshi, Vaidehisa Vilasa[*] (pc, ND, 1914). Jatayu[*]
attempts to stop Ravana[*] , f. 84r.
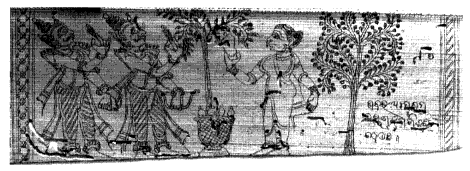
Figure 118.
Michha Patajoshi, Vaidehisa Vilasa[*] (pc, ND, 1914). Meeting with
Sabari, f. 90r.
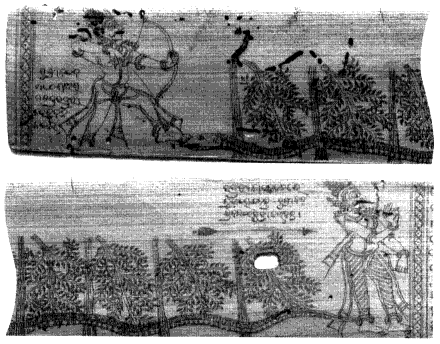
Figure 119.
Michha Patajoshi, Vaidehisa Vilasa[*] (pc, ND, 1914). Seven trees,
f. 127r.
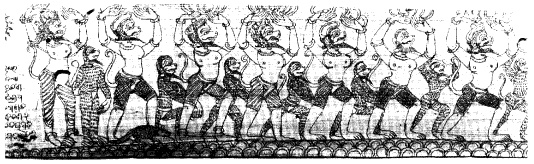
Figure 120.
Michha Patajoshi, Vaidehisa Vilasa[*] (pc, ND, 1914). Building the
bridge, f. 146r.
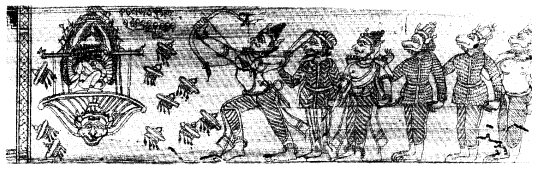
Figure 121.
Michha Patajoshi, Vaidehisa Vilasa[*] (pc, ND, 1914). Shooting
Ravana's[*] umbrellas, f. 151r.
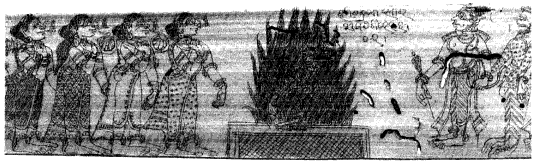
Figure 122.
Michha Patajoshi, Vaidehisa Vilasa[*] (pc, ND, 1914). Sita's test.
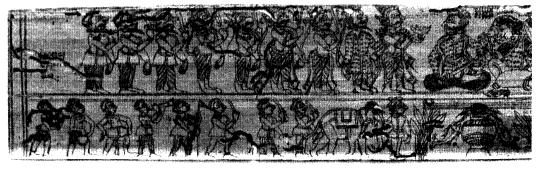
Figure 123.
Michha Patajoshi, Vaidehisa Vilasa[*] (pc, ND, 1914). Coronation of
Rama, left half, f. 229r.
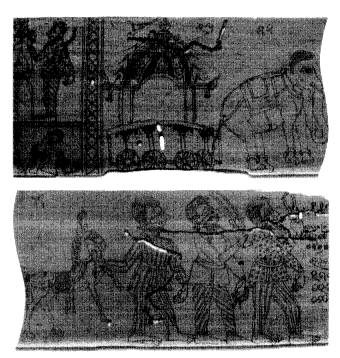
Figure 124.
Michha Patajoshi, Vaidehisa Vilasa[*] (pc, ND, 1914).
Coronation of Rama, right half, f. 229r.
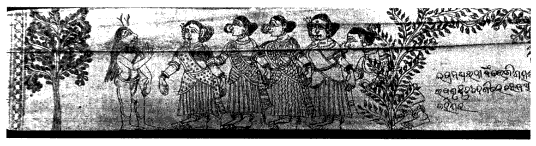
Figure 125.
Michha Patajoshi, Vaidehisa Vilasa[*] (courtesy Asutosh Museum,
Calcutta, dated 1926). Risyasringa[*] and the courtesans, f. 26v.
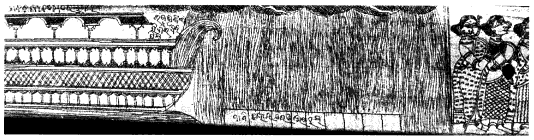
Figure 126.
Michha Patajoshi, Vaidehisa Vilasa[*] (Asutosh, 1926). Rains are
brought, f. 28r.
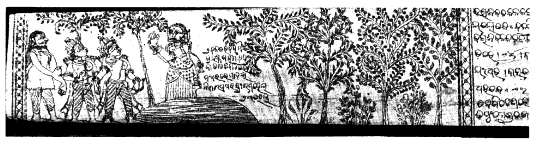
Figure 127.
Michha Patajoshi, Vaidehisa Vilasa[*] (Asutosh, 1926). Ahalya
liberated, f. 47v.
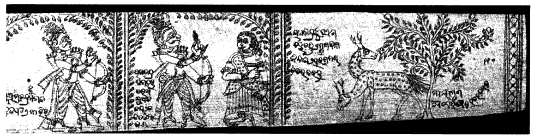
Figure 128.
Michha Patajoshi, Vaidehisa Vilasa[*] (Asutosh, 1926). Magic deer
appears, f. 110r.
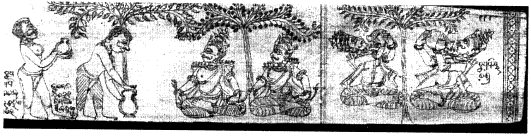
Figure 129.
Michha Patajoshi, Vaidehisa Vilasa[*] (Asutosh, 1926). Rama,
Laksmana[*] , and the cowherds, f. 118r.
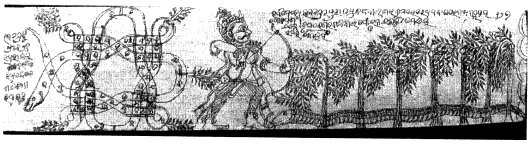
Figure 130.
Michha Patajoshi, Vaidehisa Vilasa[*] (Asutosh, 1926). Seven trees,
f. 127r.
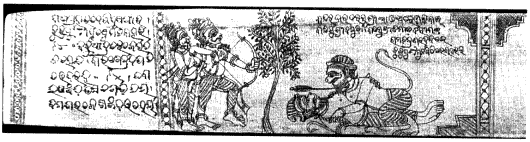
Figure 131.
Michha Patajoshi, Vaidehisa Vilasa[*] (Asutosh, 1926). Valin and
Sugriva fight, f. 130v.
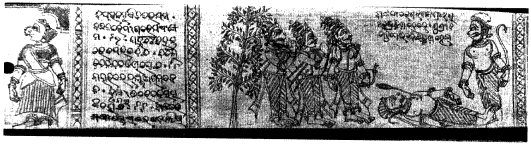
Figure 132.
Michha Patajoshi, Vaidehisa Vilasa[*] (Asutosh, 1926). Death of Valin,
f. 130v.
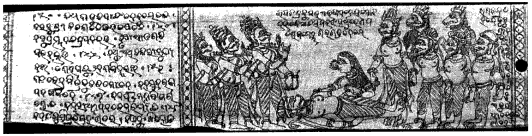
Figure 133.
Michha Patajoshi, Vaidehisa Vilasa[*] (Asutosh, 1926). Tara's curse,
f. 131v.
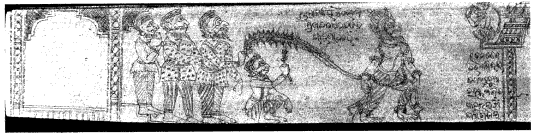
Figure 134.
Michha Patajoshi, Vaidehisa Vilasa[*] (Asutosh, 1926). Hanumana in
Lanka[*] , f. 170v.
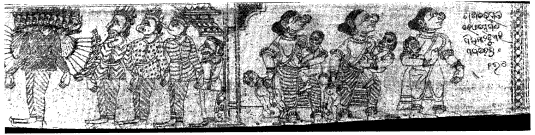
Figure 135.
Michha Patajoshi, Vaidehisa Vilasa[*] (Asutosh, 1926). Consternation
in Lanka[*] , f. 170v.

Figure 136.
Michha Patajoshi, Vaidehisa Vilasa[*] (Asutosh, 1926). Angada's[*]
embassy, f. 203r.
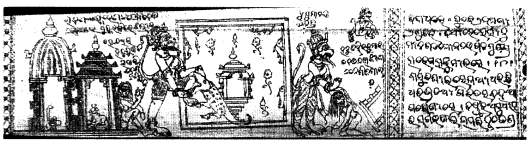
Figure 137.
Michha Patajoshi, Vaidehisa Vilasa[*] (Asutosh, 1926). Hanumana at
Kalanemi's ashram, f. 221v.
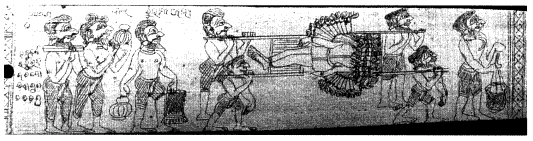
Figure 138.
Michha Patajoshi, Vaidehisa Vilasa[*] (Asutosh, 1926). Ravana's[*]
corpse, f. 241v.
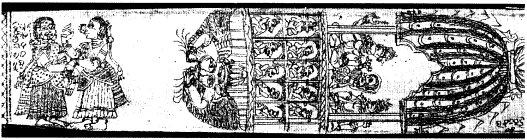
Figure 139.
Michha Patajoshi, Vaidehisa Vilasa[*] (Asutosh, 1926). Rama and Sita
return to Ayodhya, f. 250r.
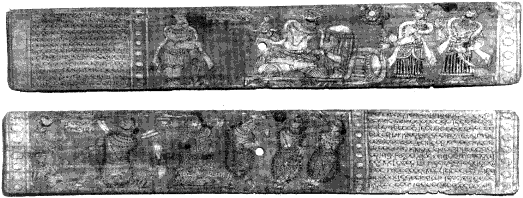
Figure 140.
Lavanyavati[*] (courtesy National Museum, New Delhi, no. 72.109),
f. 36v: (top) King of Sinhala; f. 37v: (above) Coronation of Rama.
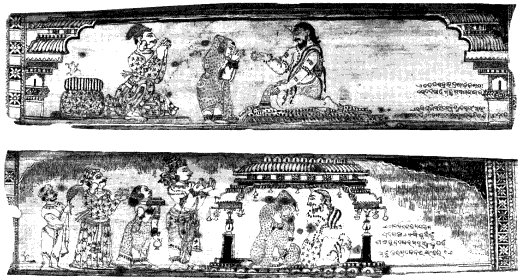
Figure 141.
Dispersed Lavanyavati[*] (private collection, United States).
Risyasringa[*] meets and marries Santa.
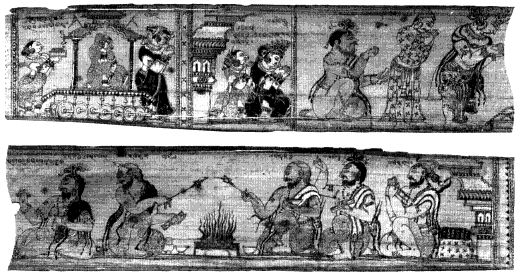
Figure 142.
Dispersed Lavanyavati[*] (private collection, US). Dasaratha's sacrifice.
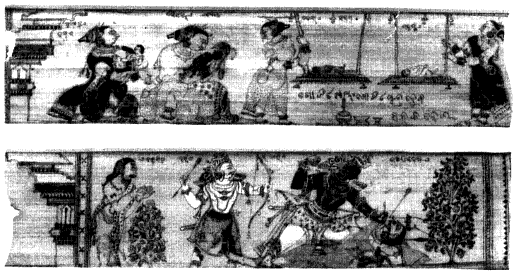
Figure 143.
Dispersed Lavanyavati[*] (courtesy National Museum, New Delhi, no.
62.616F r). Birth of sons to Dasaratha; Tadaki[*] . Photo National Museum.
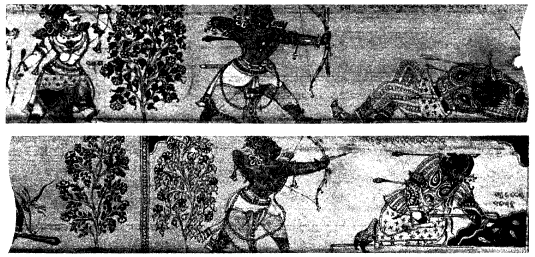
Figure 144.
Dispersed Lavanyavati[*] (NM 62.616F v): (top) Rama shoots Subahu;
(above) Maricha.
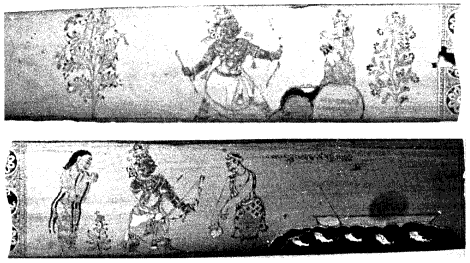
Figure 145.
Dispersed Lavanyavati[*] (NM 62.616C r): (top) Ahalya; (above) Boatman.
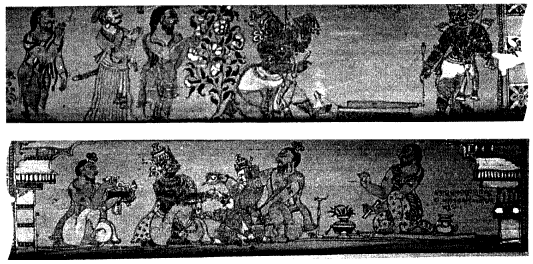
Figure 146.
Dispersed Lavanyavati[*] (NM 62.616C v): (top) Rama bends Siva's
bow; (above) marries Sita.
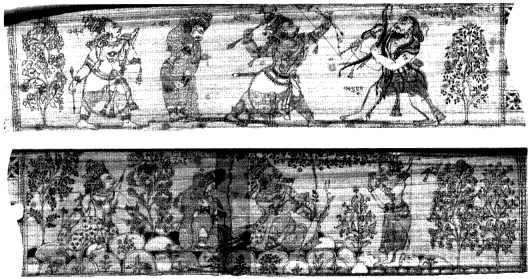
Figure 147.
Dispersed Lavanyavati[*] (Jean and Francis Marshall Collection, San
Francisco r): (top) Parasurama; (above) Bharata's visit.
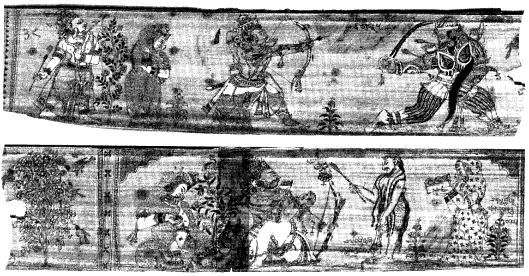
Figure 148.
Dispersed Lavanyavati[*] (Marshall Col. v). Rama meets Viradha, Atri
and Anasuya.
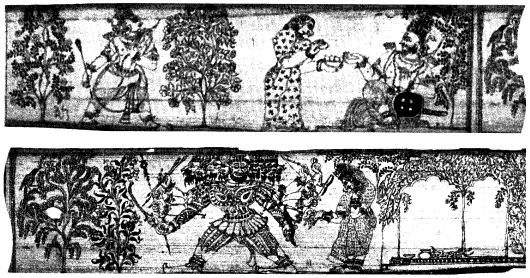
Figure 149.
Dispersed Lavanyavati[*] (courtesy National Museum, New Delhi, no.
63.126/14 r): (top) Sabari; (above) Kidnap.
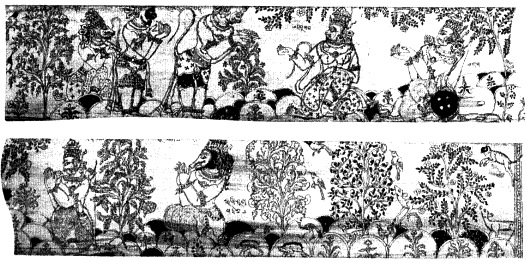
Figure 150.
Dispersed Lavanyavati[*] (NM 63.126/14 v): (top) Rama, Laksmana[*] ,
and (above) monkeys.
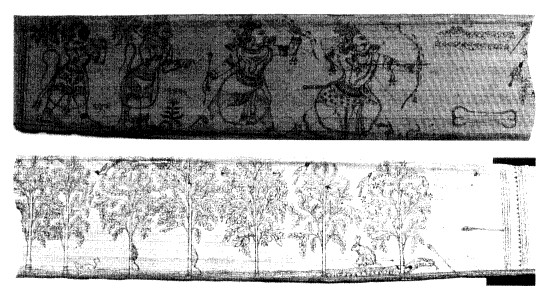
Figure 151.
Dispersed Lavanyavati[*] (NM 63.126/2 r): (top) Dundubhi's bone;
(above) Seven trees.
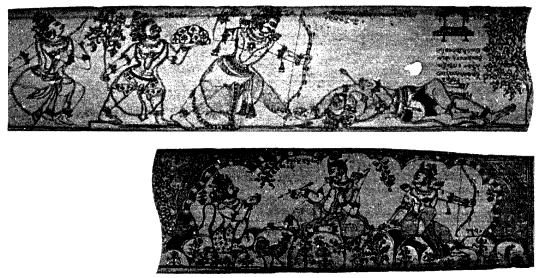
Figure 152.
Dispersed Lavanyavati[*] (NM 63.126/2 v): (top) Death of
Valin; (above) Mount Malyavan.
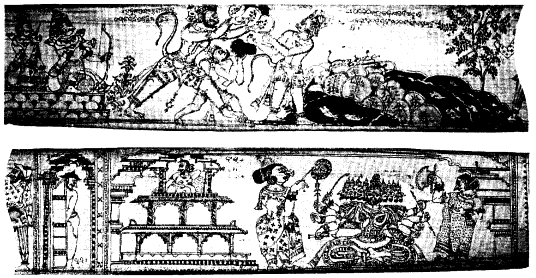
Figure 153.
Dispersed Lavanyavati[*] (NM 63.126/16 r): (top) Building the bridge;
(above) Ravana[*] in Lanka[*] .
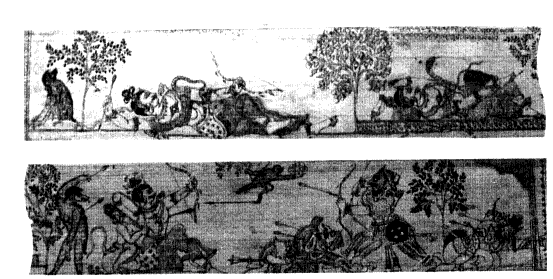
Figure 154.
Dispersed Lavanyavati[*] (NM 63.126/16 v): (top) Rama and
Laksmana[*] shot by Indrajita; (above) Hanumana bringing mountain.
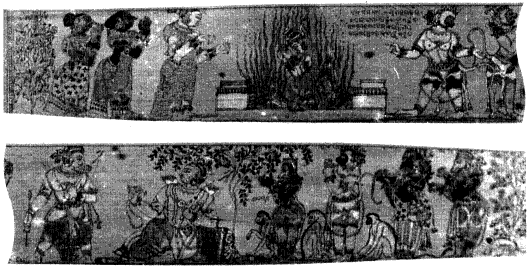
Figure 155.
Dispersed Lavanyavati[*] (courtesy Birla Academy of Art and Culture,
no. A246 r): (top and above) Sita's test. Photo Birla Academy.
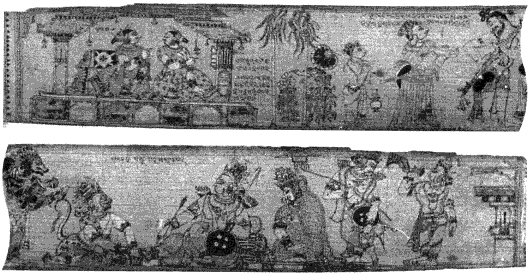
Figure 156.
Dispersed Lavanyavati[*] (Birla Acaderny A246 v): (top and above)
Lavanyavati[*] watches coronation of Rama. Photo Birla Academy.
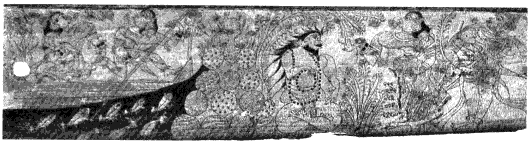
Figure 157.
Balabhadra Pathy, Lavanyavati[*] (courtesy National Museum of India,
New Delhi, no. 80.1276). Risyasringa[*] and courtesans, f. 138r.
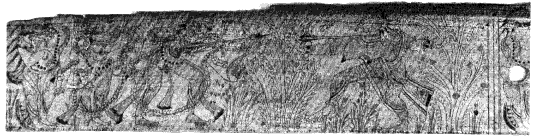
Figure 158.
Balabhadra Pathy, Lavanyavati[*] (NM 80.1276). Tadaki[*] , f. 143v.

Figure 159.
Balabhadra Pathy, Lavanyavati[*] (NM 80.1276). Ahalya liberated,
f. 144r.
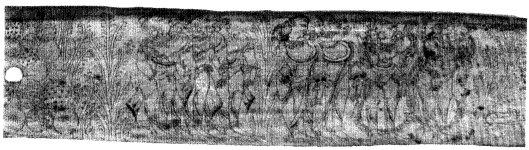
Figure 160.
Balabhadra Pathy, Lavanyavati[*] (NM 80.1276). Bharata's party
approaches Chitrakuta[*] , f. 151v.
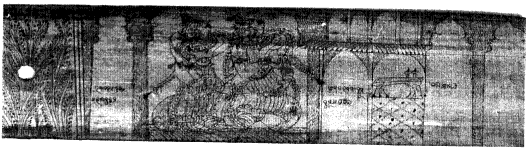
Figure 161.
Balabhadra Pathy, Lavanyavati[*] (NM 80.1276). Bharata worships
Rama's sandals, f. 159v.
Figure 162.
Balabhadra Pathy, Lavanyavati[*] (NM 80.1276). Laksmana[*] denoses
Surpanakha[*] , f. 162r.
Figure 163.
Balabhadra Pathy, Lavanyavati[*] (NM 80.1276). Ravana[*] watches
Laksmana[*] , Sita, and Rama, f. 165r.
Figure 164.
Balabhadra Pathy, Lavanyavati[*] (NM 80.1276). Rama chases magic
deer, f. 165v.
Figure 165.
Balabhadra Pathy, Lavanyavati[*] (NM 80.1276). Rama shoots magic
deer, f. 166r.
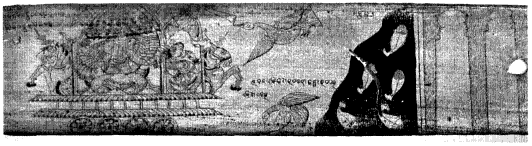
Figure 166.
Balabhadra Pathy, Lavanyavati[*] (NM 80.1276). Jatayu[*] attempts to
stop Ravana[*] , f. 166v.
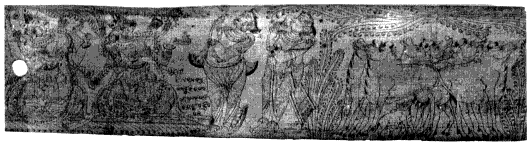
Figure 167.
Balabhadra Pathy, Lavanyavati[*] (NM 80.1276). Rama, Laksmana[*] ,
and the cowherds, f. 168r.
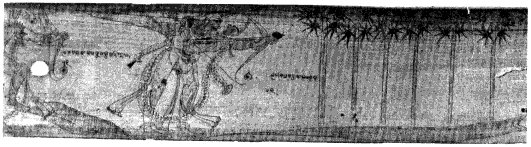
Figure 168.
Balabhadra Pathy, Lavanyavati[*] (NM 80.1276). Dundubhi's bones,
Seven trees, f. 169v.
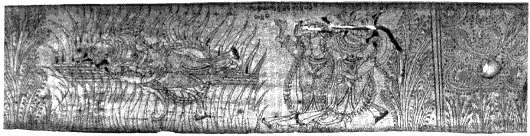
Figure 169.
Balabhadra Pathy, Lavanyavati[*] (NM 80.1276). Valin's cremation,
f. 171r.
Figures 170, 171.
Balabhadra Pathy, Lavanyavati[*] (NM 80.1276), f. 173v: (top
and above) Rains on Mount Malyavan.
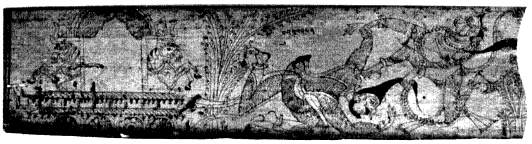
Figure 172.
Balabhadra Pathy, Lavanyavati[*] (NM 80.1276). Hanumana in Lanka[*] ,
f. 185r.
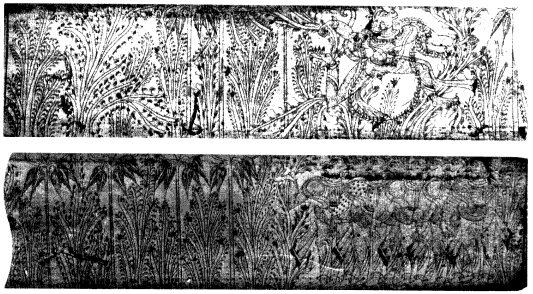
Figure 173.
Balabhadra Pathy, Lavanyavati[*] (NM 80.1276). Hanumana in Lanka[*] ,
f. 180v.
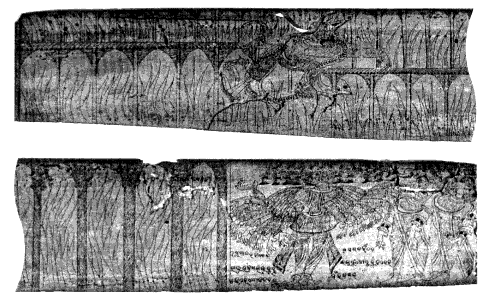
Figure 174.
Balabhadra Pathy, Lavanyavati[*] (NM 80.1276). Hanumana sets fire
to Lanka[*] , f. 200v.
Figure 175.
Raghunath Prusti, Lavanyavati[*] (private collection, Mundamarai).
Risyasringa[*] brought to Lomapada, f. 72r.
Figure 176.
Raghunath Prusti, Lavanyavati[*] (pc, M). Risyasringa[*] and Jarata,
brought to Ayodhya, sacrifice, birth of Dasaratha's sons, f. 72v.
Figure 177.
Raghunath Prusti, Lavanyavati[*] (pc, M). Tadaki[*] ; Visvamitra's
sacrifice, Rama shoots Maricha, f. 73r.
Figure 178.
Raghunath Prusti, Lavanyavati[*] (pc, M). Ahalya's liberation,
Boatman, Rama bends Siva's bow, f. 73v.
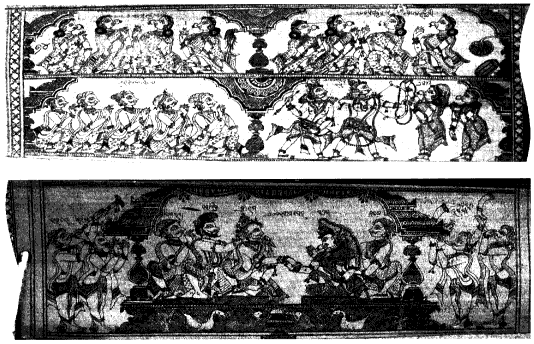
Figure 179.
Raghunath Prusti, Lavanyavati[*] (pc, M). Rama's marriage, f. 74r.
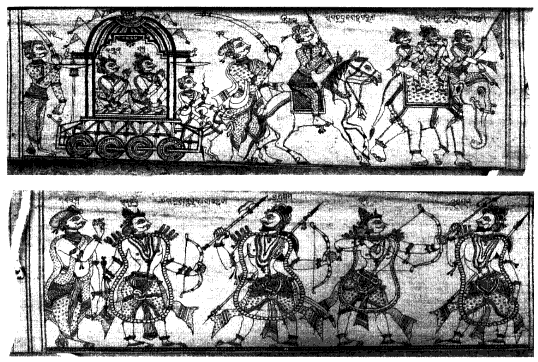
Figure 180.
Raghunath Prusti, Lavanyavati[*] (pc, M). Meeting with Parasurama,
f. 74v.
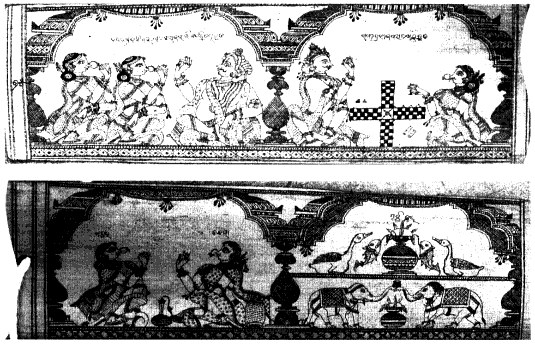
Figure 181.
Raghunath Prusti, Lavanyavati[*] (pc, M). Preparations for Rama's
coronation, Manthara and Kaikeyi, f. 75r.
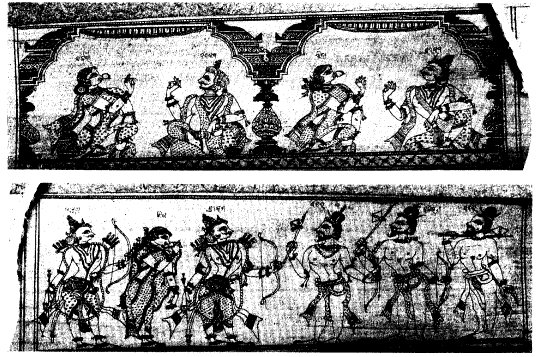
Figure 182.
Raghunath Prusti Lavanyavati[*] (pc, M). Kaikeyi and Dasaratha, Sita
and Rama; Rama meets Sabaras, f. 75v.
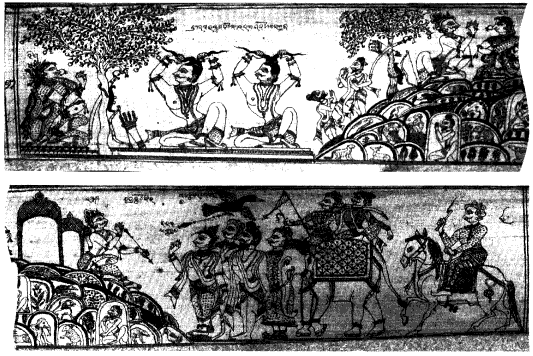
Figure 183.
Raghunath Prusti, Lavanyavati[*] (pc, M). Rama binds up hair, the
ocher mark, Bharata's visit, f. 76r.
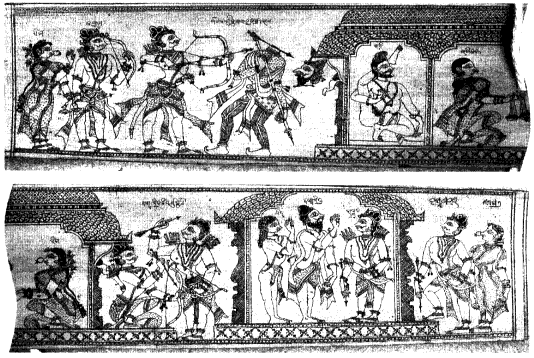
Figure 184.
Raghunath Prusti, Lavanyavati[*] (pc, M). Viradha, Atri, and Anasuya,
Visvamitra and disciple meet Rama, f. 76v.
Figure 185.
Raghunath Prusti, Lavanyavati[*] (pc, M). Surpanakha[*] denosed, fight
with Khara and Dusana[*] , f. 77r.
Figure 186.
Raghunath Prusti, Lavanyavati[*] (pc, M). The magic deer, f. 77v.

Figure 187.
Raghunath Prusti, Lavanyavati[*] (pc, M). Jatayu[*] attempts to stop
Ravana[*] , Kidnap, Rama and Laksmana[*] return with dead deer, f. 78r.
Figure 188.
Raghunath Prusti, Lavanyavati[*] (pc, M). Sita in Lanka[*] , Rama finds
empty hut, meets Jatayu[*] , f. 78v.
Figure 189.
Raghunath Prusti, Lavanyavati[*] (courtesy Bharat Kala Bhavan,
Banaras, no. 10927). Valin's death, Rama and vanaras, building
the bridge, f. 80r.
Figure 190.
Raghunath Prusti, Lavanyavati[*] (BKB 10927). Ravana's[*] umbrellas
cut, Laksmana[*] and Jambavan, f. 80v.
Figure 191.
Raghunath Prusti, Lavanyavati[*] (BKB 10928). Siege of Lanka[*] , f. 81r.
Figure 192.
Raghunath Prusti, Lavanyavati[*] (BKB 10928). Indrajita in battle,
Hanumana brings mountain to Rama, f. 81v.
Figure 193.
Raghunath Prusti, Lavanyavati[*] (private collection, Mundamarai).
Performers rewarded, f. 83r.
Figure 194.
Brahma Ramayana[*] (Matha[*] collection). Brahma's garden, f. 6v.
Figure 195.
Brahma Ramayana[*] . Tadaki[*] , f. 13r.

Figure 196.
Brahma Ramayana[*] . Ahalya (detail), f. 13v.
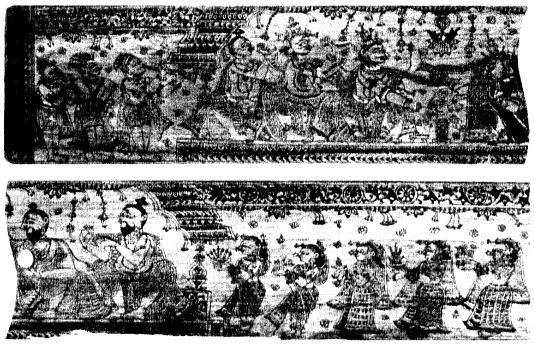
Figure 197.
Brahma Ramayana[*] . Rama's marriage, f. 21r.
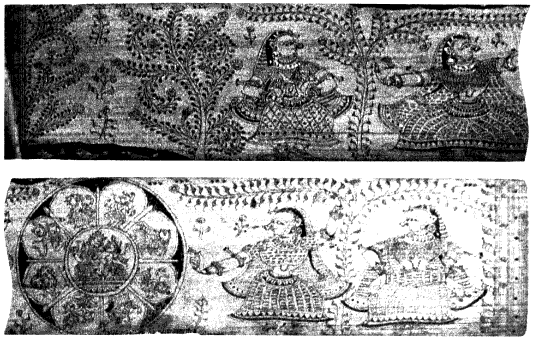
Figure 198.
Brahma Ramayana[*] . Ramakrida[*] (sport of Rama), f. 46r.
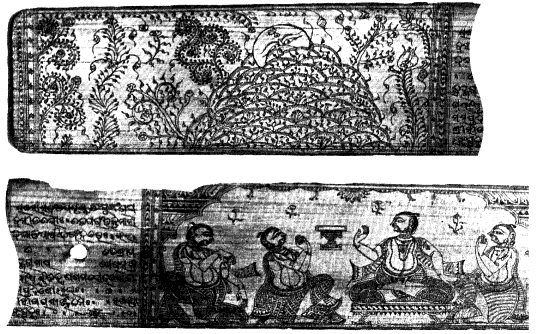
Figure 199.
Brahma Ramayana[*] . Final sacrifice, f. 65v.
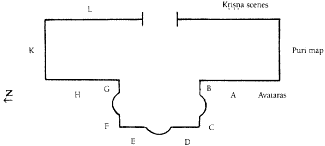
Wall A (from bottom to top)
tier 1 (right to left)
Risyasringa's[*] sacrifice
Risyasringa[*] & Dasaratha
Dasaratha & 3 queens
4 births
tier 2 (left to right)
4 sons in swings
Dasaratha & Visvamitra
Visvamitra takes Rama & Laksmana[*]
Visvamitra's sacrifice
Rama & Tadaki[*]
Rama & Ahalya
tier 3 (left to right)
Boatman washes feet
Rama & Laksmana[*] disembark
Sita garlands Rama
Marriage l—vivaha
Marriage 2—majju sajya (hands joined)
Parasurama & Dasaratha?
Parasurama & Rama
tier 4 (right to left)
Manthara & Kaikeyi
Rama & Sita in shrine?
Rama, Sita, Laksmana[*] , 3 mothers
Chariot—Rama's exile
Sita, Rama & Laksmana[*] wind hair as ascetics
Rama, Laksmana[*] , & sage?
tier 5 (right to left)
Rama & Sita, Laksmana[*] with bow
Rama, Sita, Laksmana[*] on Chitrakuta[*]
Surpanakha[*] denosed by Laksmana[*] ; Rama & Sita?
Surpanakha[*] before Ravana[*] ?
Wall B (from top to bottom)
tier 1 (left to right)
Deer
Rama shoots Maricha in human form
Laksmana[*] & Sita?
tier 2 (right to left)
Sita in hut, Ravana[*] as beggar
Rama, Laksmana[*] , & dead deer
Ravana[*] , Sita (kidnapped), & Jatayu[*]
tier 3 (left to right)
Rama & 2 blue figures (Kumbhasura & Kabanda?)
Rama, Laksmana[*] , & cowherd
tier 4
Blue figure & woman (Sabari?), room
Wall C (from top to bottom)
Hanumana meets Rama
Dundubhi's bones
7 sal trees
Death of Valin
Wall D
top: Bharata's visit
bottom: Rama, Laksmana[*] , & monkeys
Wall E
top: Chitrakuta[*] ; Rama marks Sita with ocher
bottom: Building the bridge to Lanka[*]
Wall F
top: Jambhavan; Laksmana[*] straightens arrow on way to Kiskindha[*]
bottom: Blue ascetic & youth (Visvamitra and disciple)
Wall G: Rama, Laksmana[*] , Vibhisana[*] , monkeys, cutting umbrellas of Ravana[*]
Wall H
top, right: Battle with Indrajita? charioteer vs. archer
bottom, right: Hanumana with Gandhamadana; Garuda[*] with snake
top, left; Death of Kumbhakarna[*] ? big white figure
bottom, left: Visnu[*] , twice
Wall K (top): Battle between Rama (right) & Ravana[*] (left)
Wall L: Visit to Bharadvaja's ashram? Atri's ashram out of sequence?
Figure 200.
Buguda, Viranchi[*] Narayana[*] Temple, plan showing location (A-L)
of Ramayana[*] paintings.
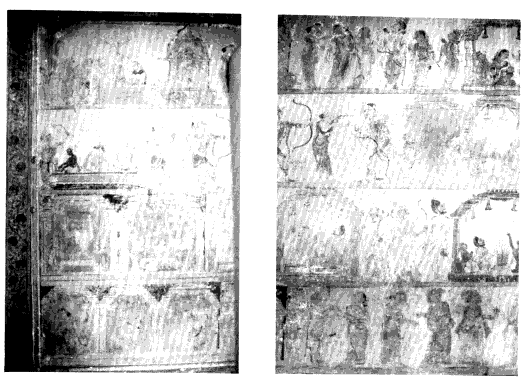
Figure 201.
Buguda mural, wall A (above and opposite, top of page). From
Sacrifice by Risyasringa[*] to Rama's exile (read bottom to top).
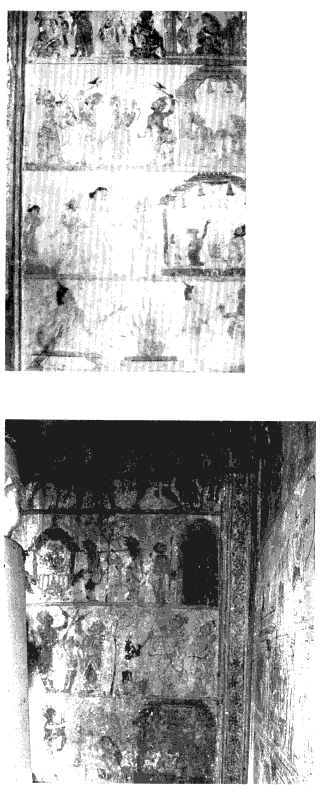
Figure 202.
Buguda mural, wall B (opposite; read top to bottom). Magic deer;
Kidnap, Jatayu[*] , Rama, Laksmana[*] , and dead deer; Rama encountering Kabandha,
cowherds; Sabari.
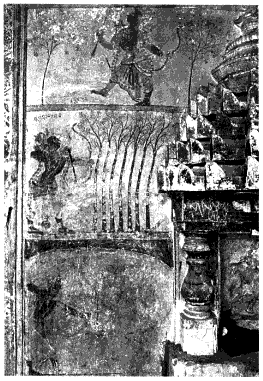
Figure 203.
Buguda mural, wall C. Dundubhi's
bones, Seven trees, Death of Valin.
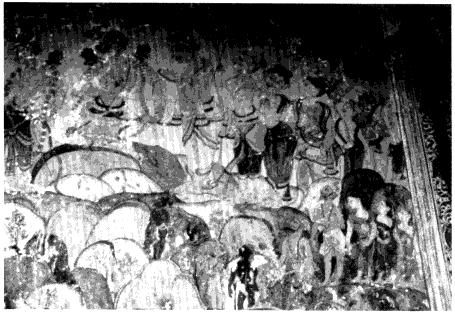
Figure 204.
Buguda mural, wall D. Bharata's visit.
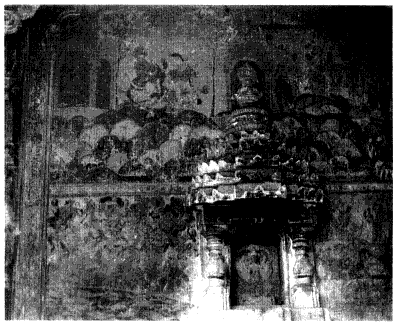
Figure 205.
Buguda mural, walls D-E, general view. Bharata's visit, Rama
and monkeys, Ocher mark, Building the bridge.
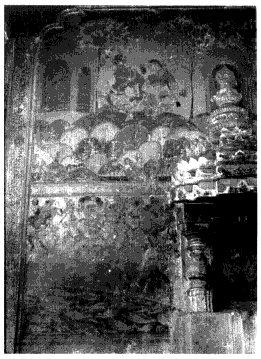
Figure 206.
Buguda mural, wall E. Ocher mark, Building the bridge.
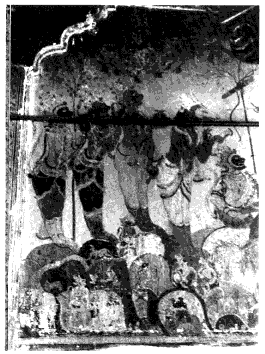
Figure 207.
Buguda mural, wall G, top.
Cutting Ravana's[*] umbrellas (left).
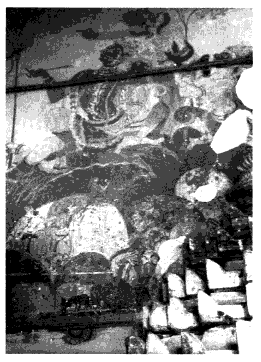
Figure 208.
Buguda mural, wall G, top right.
Vibhisana[*] points to Ravana[*] .
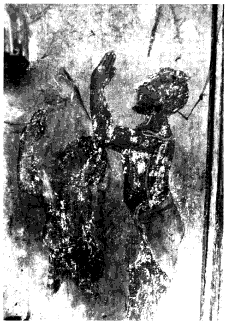
Figure 209.
Buguda mural, wall F, top.
Visvamitna and disciple.
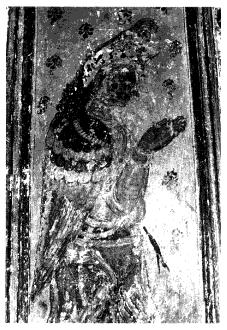
Figure 210.
Buguda mural, wall H,
bottom. Garuda[*] .
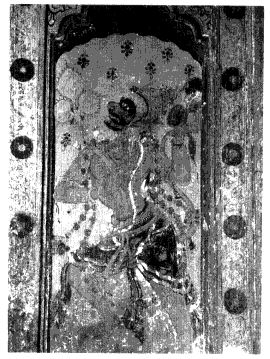
Figure 211.
Buguda mural, wall H, bottom.
Hanumana.
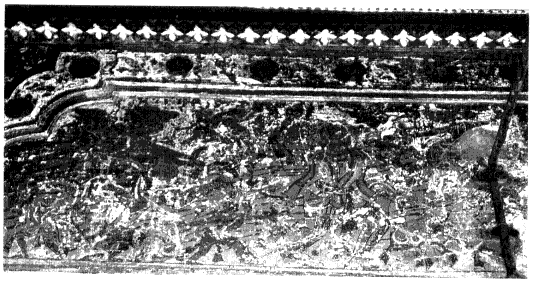
Figure 212.
Buguda mural, wall H, left, top. Battle with Kumbhakarna[*] .
Figure 213.
Buguda mural, wall K. Battle
between Ravana[*] and Rama.
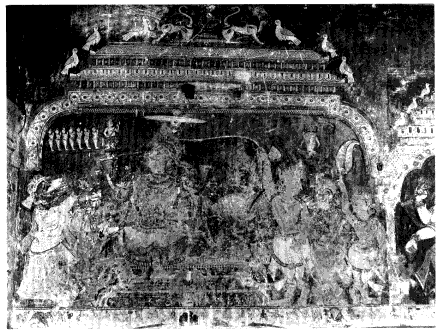
Figure 214.
Mural in Gangamata Matha[*] , Puri. Coronation of Rama. Photo:
Archaeological Survey of India.
Figure 215.
Mural in Jagannatha Temple, Manikarnika Sahi, Purl. Cutting
Ravana's[*] umbrellas.

Figure 216.
Pata[*] painting (courtesy of Bibliothèque Nationale). Map of Puri,
confrontation between Rama and Ravana[*] in upper right. Photo Bibliothèque
Nationale.
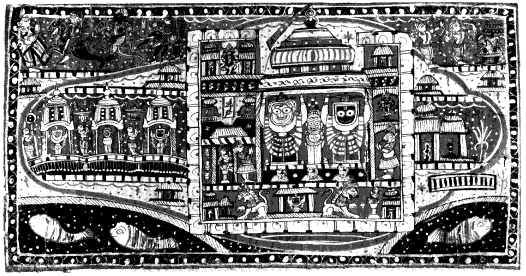
Figure 217.
Pata[*] painting (courtesy of British Museum). Map of Puri,
confrontation between Rama and Ravana[*] in upper right. Photo British Museum.
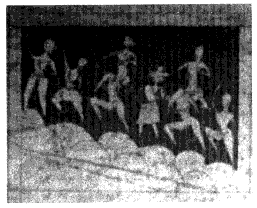
Figure 218.
Jagannath Mahapatra, 1954,
unfinished set (artist's collection).
Crossing to Lanka[*] .
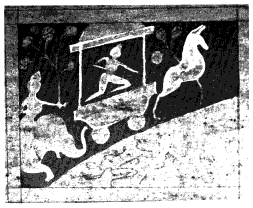
Figure 219.
Jagannath Mahapatra, 1954,
unfinished set (artist's col.). Lava and
Kusa fight Bharata and Laksmana[*] .
Figure 220.
Jagannath Mahapatra, 1965. Battle between Ravana[*] and Rama.

Figure 221.
Bibhuti Kanungo, 1977. Crossing to Lanka[*] .
Figure 222.
Bibhuti Kanungo, 1977. Battle between Ravana[*] and Rama.
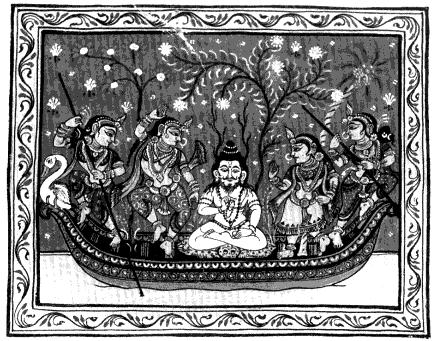
Figure 223.
Jagannath Mahapatra, 1982-83 (author's collection), no. l,
Risyasringa[*] and the courtesans.
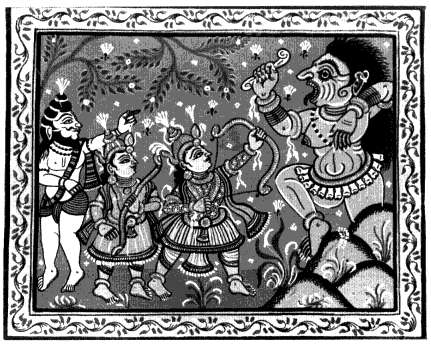
Figure 224.
Jagannath Mahapatra, 1982-83, no. 11. Tadaki[*] .
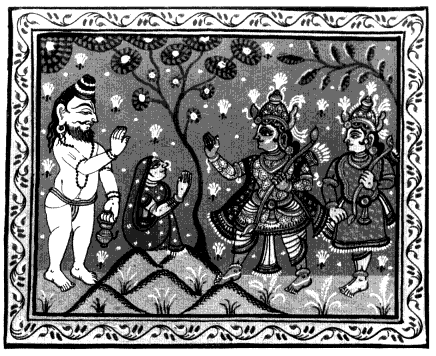
Figure 225.
Jagannath Mahapatra, 1982-83, no. 12. Ahalya liberated.
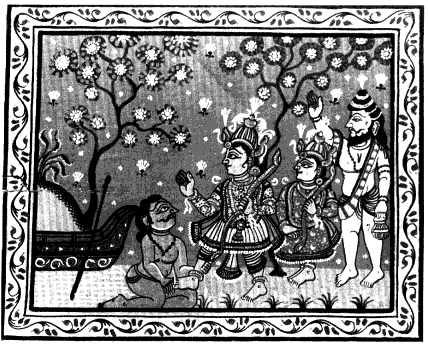
Figure 226.
Jagannath Mahapatra, 1982-83, no. 13. The boatman.
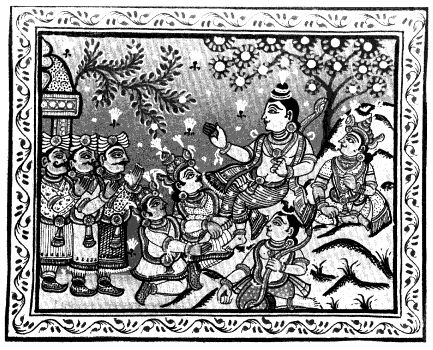
Figure 227.
Jagannath Mahapatra, 1982-83, no. 22. Bharata's visit.
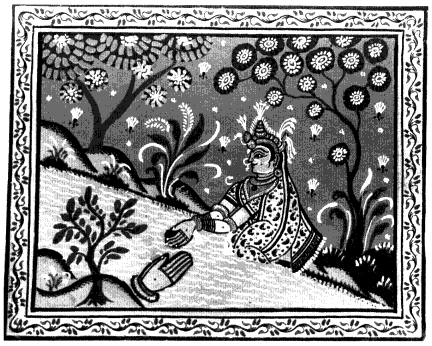
Figure 228.
Jagannath Mahapatra, 1982-83, no. 23. Dasaratha's hands receive
pinda[*] at Gaya.
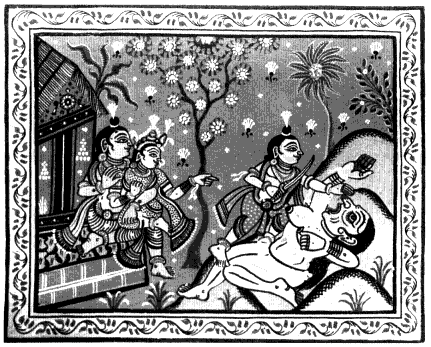
Figure 229.
Jagannath Mahapatra, 1982-83, no. 24. Surpanakha[*] denosed.
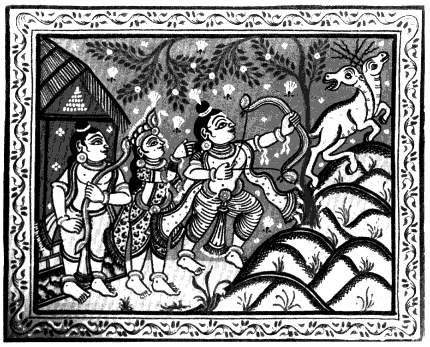
Figure 230.
Jagannath Mahapatra, 1982-83, no. 26. The magic deer.
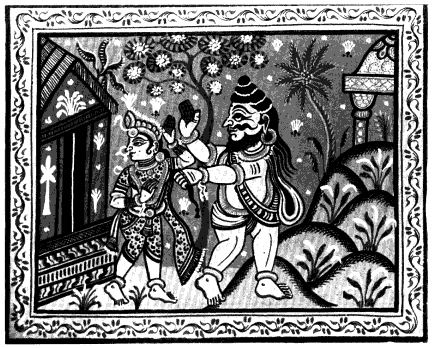
Figure 231.
Jagannath Mahapatra, 1982-83, no. 27. The kidnap.
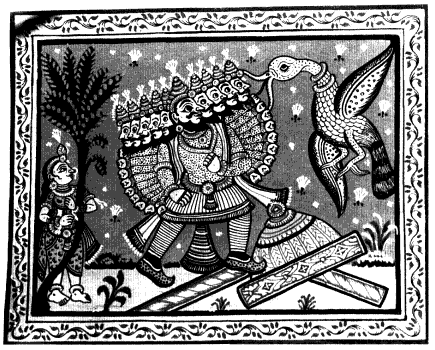
Figure 232.
Jagannath Mahapatra, 1982-83, no. 28. Jatayu[*] attempts to stop
Ravana[*] .
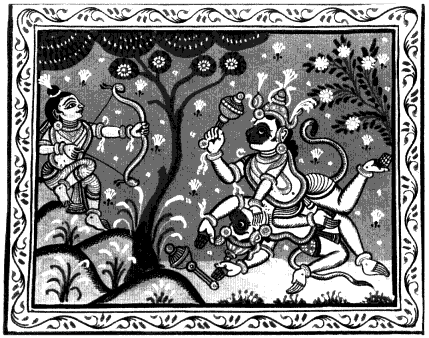
Figure 233.
Jagannath Mahapatra, 1982-83, no. 31. Death of Valin.
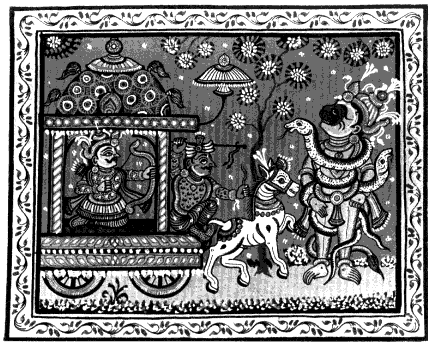
Figure 234.
Jagannath Mahapatra, 1982-83, no. 41. Hanumana shot by
serpent-arrow.
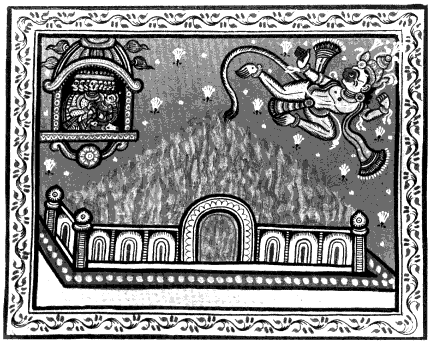
Figure 235.
Jagannath Mahapatra, 1982-83, no. 43. Hanumana sets fire to
Lanka[*] .
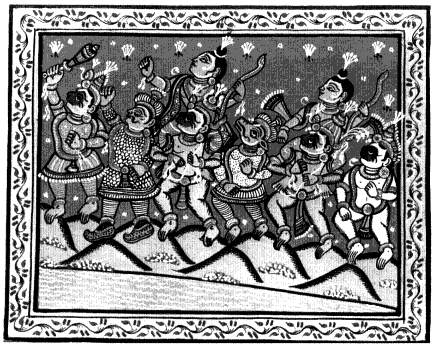
Figure 236.
Jagannath Mahapatra, 1982-83, no. 45. Crossing to Lanka[*] .
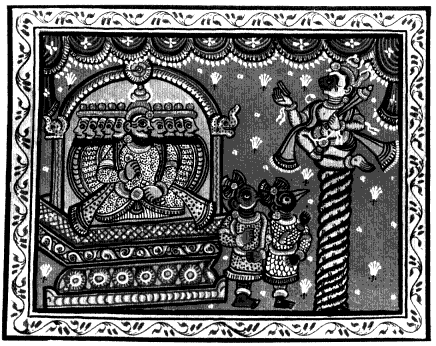
Figure 237.
Jagannath Mahapatra, 1982-83, no. 47. Angada's[*] embassy
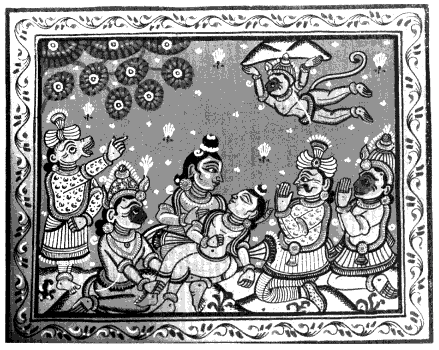
Figure 238.
Jagannath Mahapatra, 1982-83, no. 56. Hanumana with mountain.
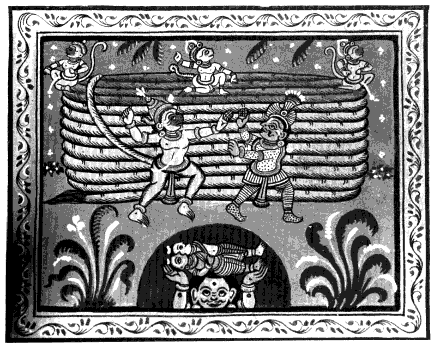
Figure 239.
Jagannath Mahapatra, 1982-83, no. 57. Mahiravana[*] kidnaps Rama
and Laksmana[*] .
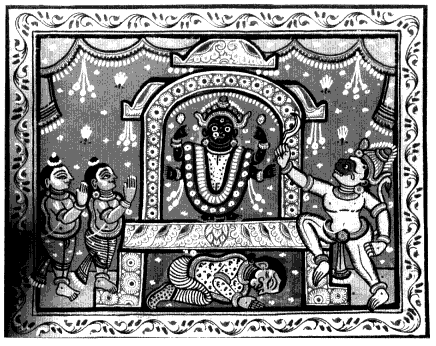
Figure 240.
Jagannath Mahapatra, 1982-83, no. 58. Mahiravana[*] bows to
Durga.
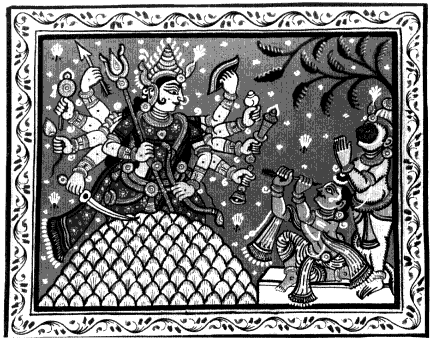
Figure 241.
Jagannath Mahapatra, 1982-83, no. 59. Rama worships Durga.

Figure 242.
Jagannath Mahapatra, 1982-83, no. 60. Ravana[*] fights Rama.
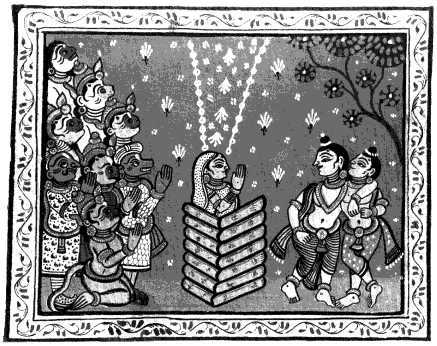
Figure 243.
Jagannath Mahapatra, 1982-83, no. 61. Sita's test.
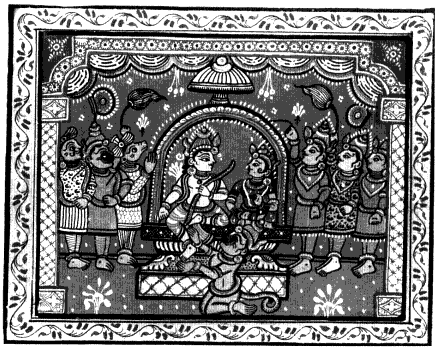
Figure 244.
Jagannath Mahapatra, 1982-83, no. 62. Coronation of Rama.
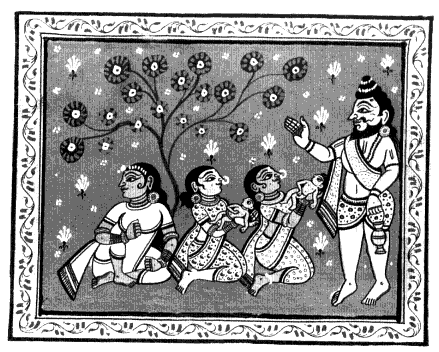
Figure 245.
Jagannath Mahapatra, 1982-83, no. 66. Sita's sons shown to
Valmiki.
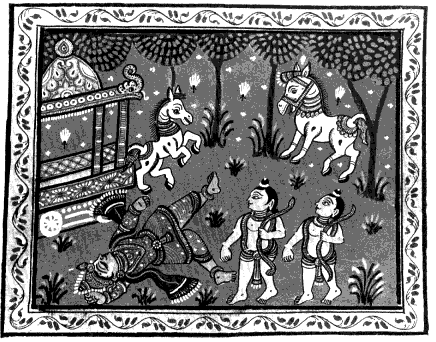
Figure 246.
Jagannath Mahapatra, 1982-83, no. 69. Lava and Kusa fight
Satrughna.
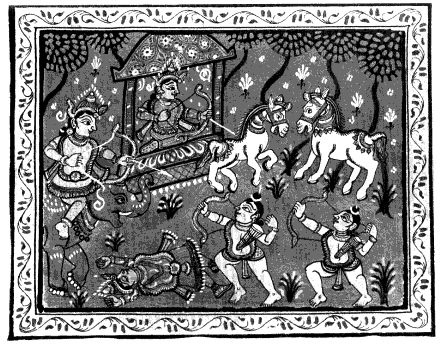
Figure 247.
Jagannath Mahapatra, 1982-83, no. 70. Lava and Kusa fight
Bharata and Laksmana[*] .
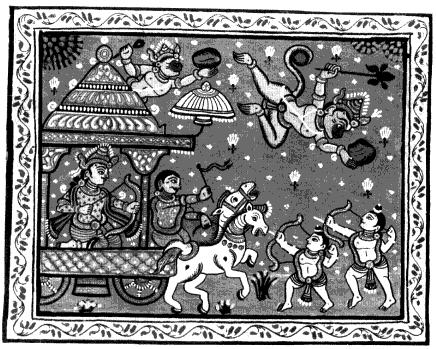
Figure 248.
Jagannath Mahapatra, 1982-83, no. 71. Lava and Kusa fight Rama.
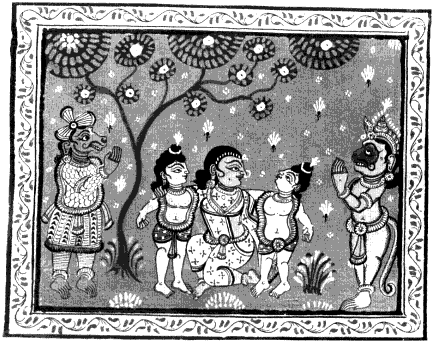
Figure 249.
Jagannath Mahapatra, 1982-83, no. 72. Lava and Kusa comfort
Sita.
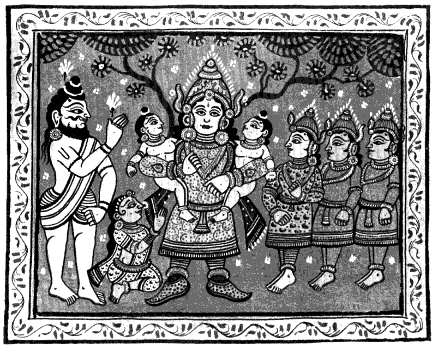
Figure 250.
Jagannath Mahapatra, 1982-83, no. 73. Rama holds his sons.
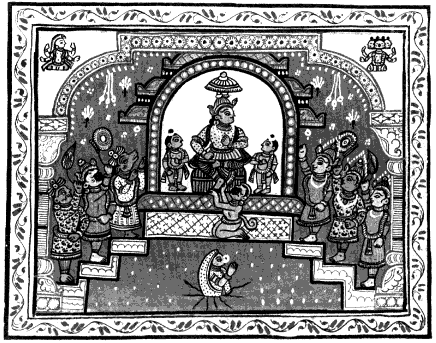
Figure 251.
Jagannath Mahapatra, 1982-83, no. 74. Sita rejoins mother earth.
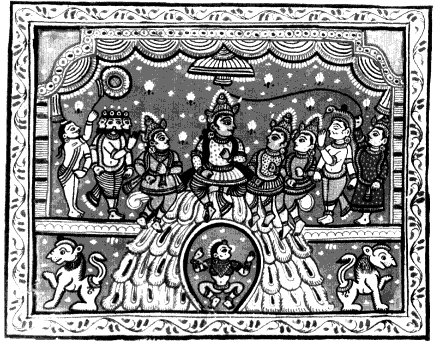
Figure 252.
Jagannath Mahapatra, 1982-83, no. 75. Rama crowns his sons.
Figure 253.
Unfinished Ramayana[*] pata[*] ,
Danda Sahi, 1983.
Figure 255.
Banamali Maharana, 1982. Pata[*]
of Bharata shooting Hanumana.
Figures 254
a-d (top of page, opposite and above). Bhikari Maharana, 1983.
Pata[*] of Rama's story in seventy-five scenes.
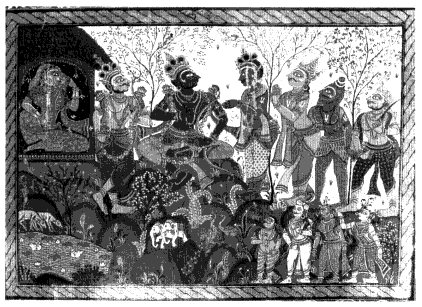
Figure 256.
Bhagavata Maharana, 1983. Pata[*] of Bharata's visit.
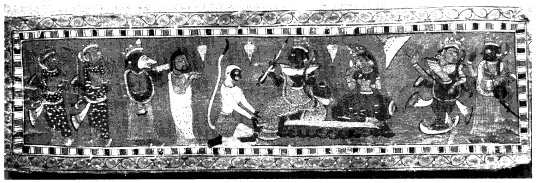
Figure 257.
Book cover (courtesy of Orissa State Museum). Coronation of
Rama.
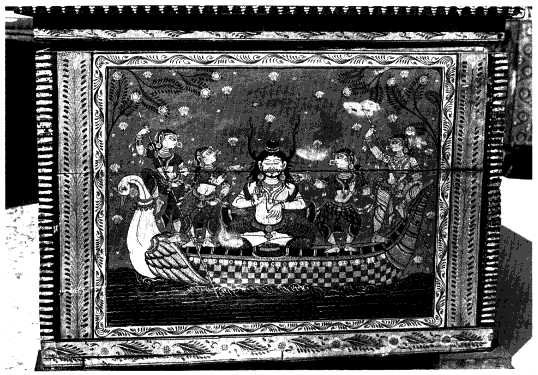
Figure 258.
Bhagavata Maharana, wooden box, 1970s. Risyasringa[*] and
courtesans.
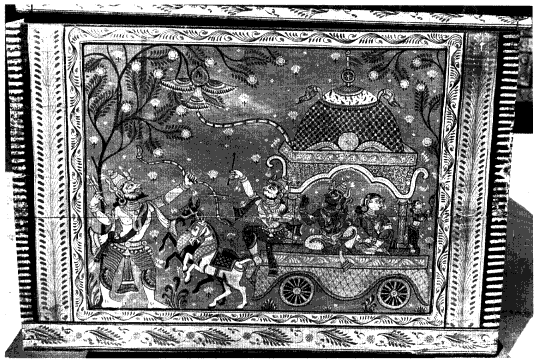
Figure 259.
Bhagavata Maharana, wooden box. Meeting with Parasurama.

Figure 260.
Bhagavata Maharana, wooden box. Bharata's visit.
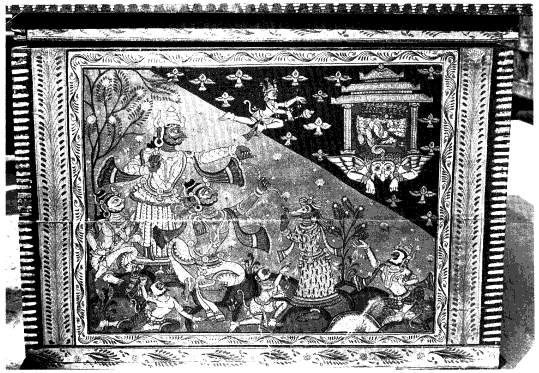
Figure 261.
Bhagavata Maharana, wooden box. Cutting Ravana's[*] umbrellas.
Figure 262.
Wall painting, Coronation of Rama, by Panu Maharana, 1950s,
Danda Sahi.
Figure 263.
Sonepur Ramayana[*] playing cards:
Indrajita suit, king; Laksmana[*] suit, minister;
Sugriva suit, one; Hanumana suit, five.
Figure 264.
Parlakhemundi, playing card
(courtesy of Victoria and Albert Museum,
London). Rama shoots Khara, Dusana[*] , and
Trisiras.
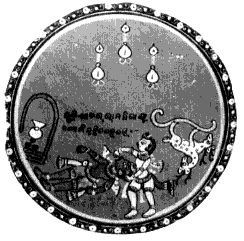
Figure 265.
Parlakhemundi, playing card
(V&A). Rama faints at not seeing Sita.
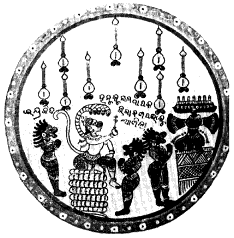
Figure 266.
Parlakhemundi, playing card
(V&A). After tying up Hanumana, Indrajita
brings him to Ravana[*] .
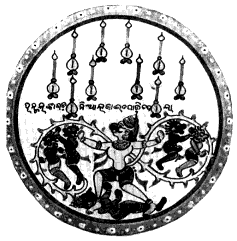
Figure 267.
Parlakhemundi, playing card
(V&A). Hanumana sets fire to Lanka[*] .
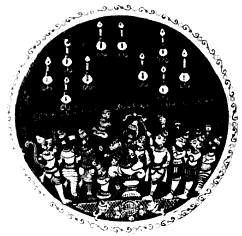
Figure 268.
Parlakhemundi, playing card
(V&A). Coronation of Rama.
Figure 269.
Jeypore, pata[*] c. 1900 (Orissa State Museum). Marriage of Rama
and his brothers.
Figure 270.
Apanna Mahapatra, Chikiti, 1982,
pata[*] . Coronation of Rama.
Figure 271.
Apanna Mahapatra, Chikiti,
1988, pata[*] . Cutting of Ravana's[*] umbrellas.
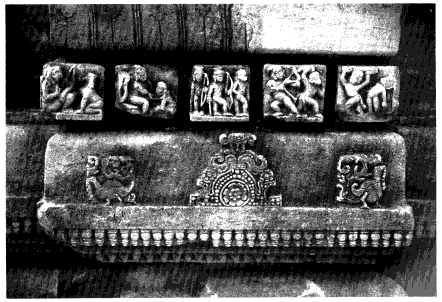
Figure 272.
Satrughnesvara Temple, Bhubaneswar, dentils. Death of Valin.
1 Rama, Laksmana[*] , & Sita see the deer
2 Rama hunts the deer
3 Maricha
4 Prima & Laksmana[*]
5 Jatayu[*] & Ravana[*]
6 Rama, Sugriva, & other monkeys
7 Rama, Laksmana[*] , and Hanumana
8 Rama shoots the sal trees
9 Rama shoots Valin
10 Valin's death
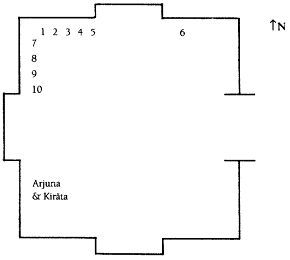
Figure 273.
Svarnajalesvara[*] Temple, Bhubaneswar. Plan showing original
placement of Ramayana[*] reliefs.
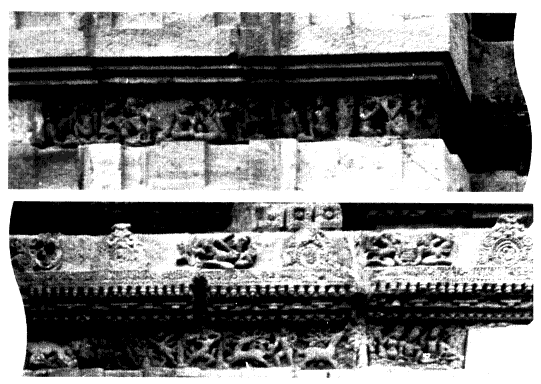
Figure 274.
Svarnajalesvara[*] Temple, Bhubaneswar. View of north frieze, 1987 (top shows 6 on
Figure 273, now moved; bottom shows 5 to 1).
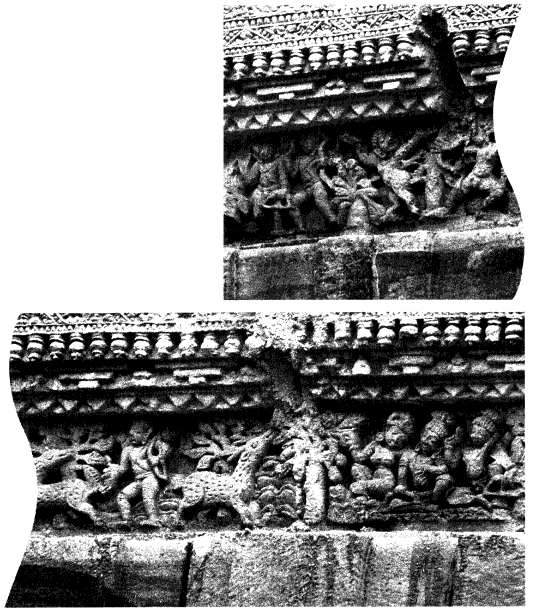
Figure 275.
Svarnajalesvara[*] Temple, Bhubaneswar, north wall. Detail of magic
deer episode (top: Maricha emerging from deer).
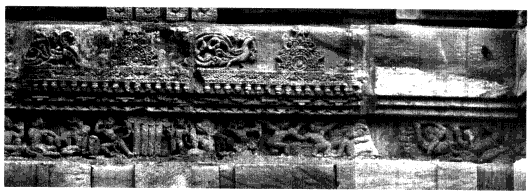
Figure 276.
Svarnajalesvara[*] Temple, Bhubaneswar, west wall. Rama shoots
trees, Death of Valin.
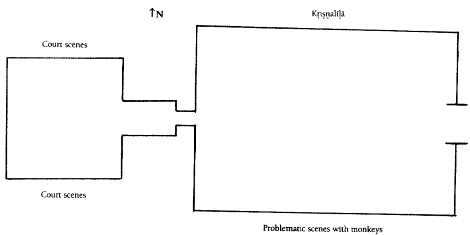
Figure 277.
Simhanatha Temple. Plan showing placement of Ramayana[*] reliefs.
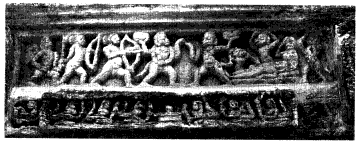
Figure 278.
Simhanatha Temple, frieze over west central niche.
Death of Valin.
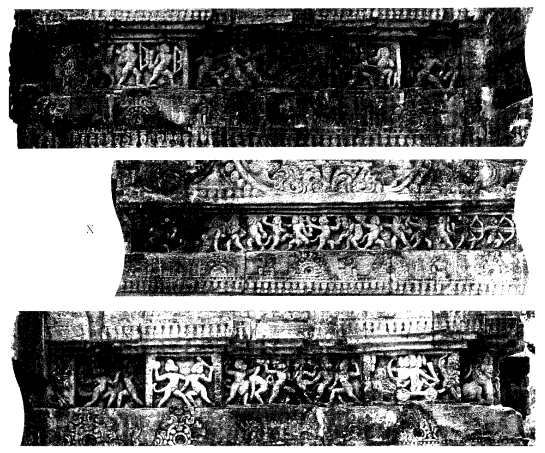
Figure 279.
Simhanatha Temple, frieze at top of west wall. Battle for Lanka[*] (see
p. 73).
1 Rama, Laksmana[*] , & Surpanakha[*] ? | 8 Rama, Laksmana[*] , & Jatayu[*] |
2 Surpanakha[*] flees Laksmana[*] | 9 Valin & Dundubhi |
3 Ravana[*] & Maricha | 10 Rama, Laksmana[*] , & Sugriva |
4 Rama & the magic deer | 11 Seven sal trees |
5 Laksmana[*] & Sita? | 12 Death of Valin |
6 Maricha, Rama, & Laksmana[*] | 13 Scenes of Lanka[*] ? |
7 Ravana[*] & Jatayu[*] |
Figure 280.
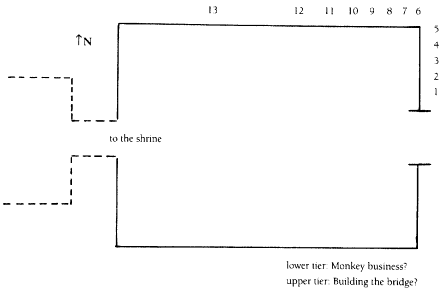
Varahi Temple, Chaurasi. Plan showing placement of Ramayana[*]
reliefs.
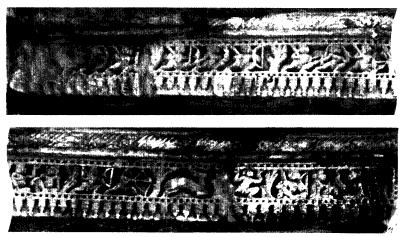
Figure 281.
Varahi Temple, Chaurasi, frieze on east wall of porch.
Surpanakha[*] , Magic deer.
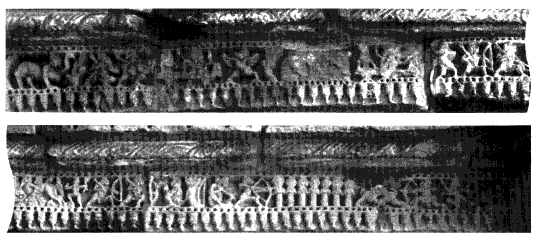
Figure 282.
Varahi Temple, Chaurasi, frieze on north wall of porch. Maricha's
death, Jatayu[*] confronts Ravana[*] and meets Rama, Valin kills Dundubhi, Rama
shoots trees, Death of Valin.
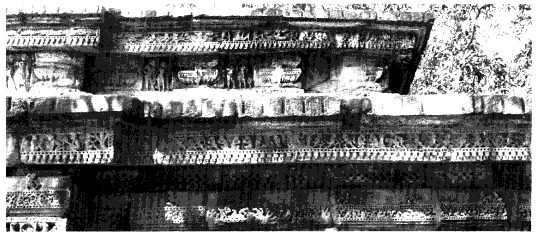
Figure 283.
Varahi Temple, Chaurasi, friezes on south wall of porch. Below,
unidentified scenes with monkeys; above, building of bridge to Lanka[*] (?).
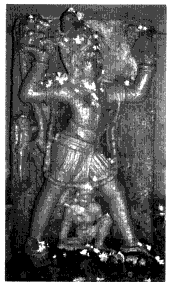
Figure 284.
Compound of Gauri Temple,
Bhubaneswar. Hanumana.
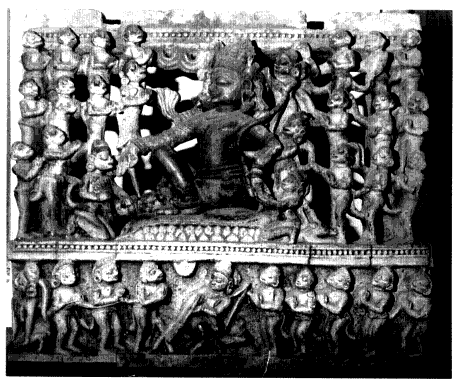
Figure 285.
Somanatha Temple, Vishnupur, window screen. Rama flanked by
monkeys; below, Laksmana[*] straightening his arrow.
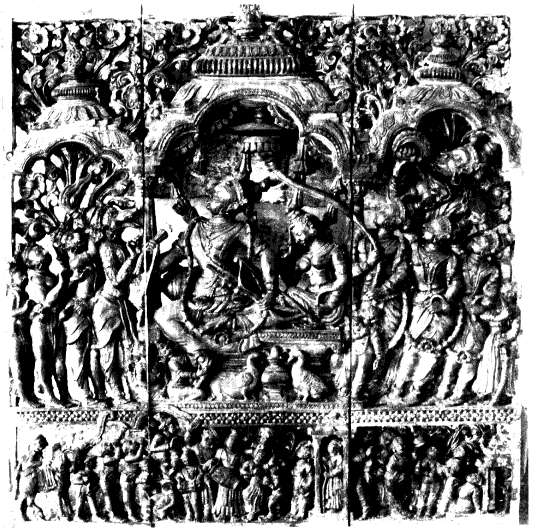
Figure 286.
Dharakot Palace, wooden window screen. Coronation of Rama.
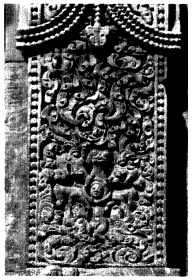
Figure 287.
Muktesvara Temple, Bhubaneswar.
Foliate carving on south wall.
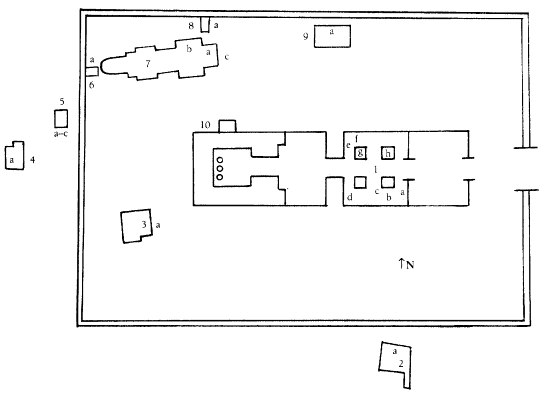
Figure 288.
Purl, Jagannatha Temple. Plan showing placement of Ramayana[*]
paintings (see Appendix 4).
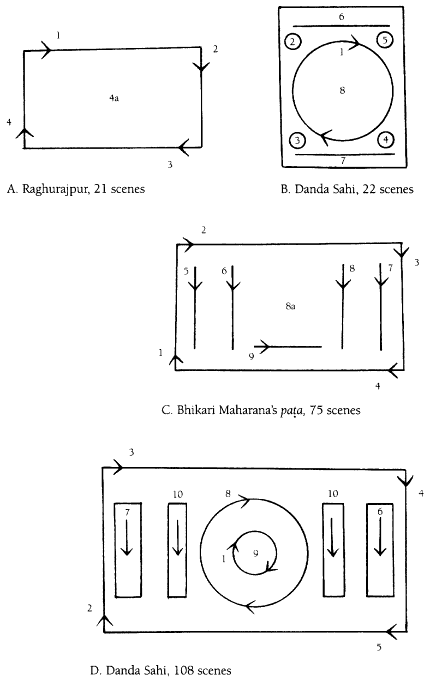
Figure 289.
Narrative patas[*] of Ramayana[*] themes, diagrams (see Appendix 5);
numbers on diagrams indicate sequence in which scenes are to be read.